This is a tutorial on how to build an osu!nono thing with a male usb A connection.
This is my first threat on osu! and im also from germany so please ignore my bad english xd
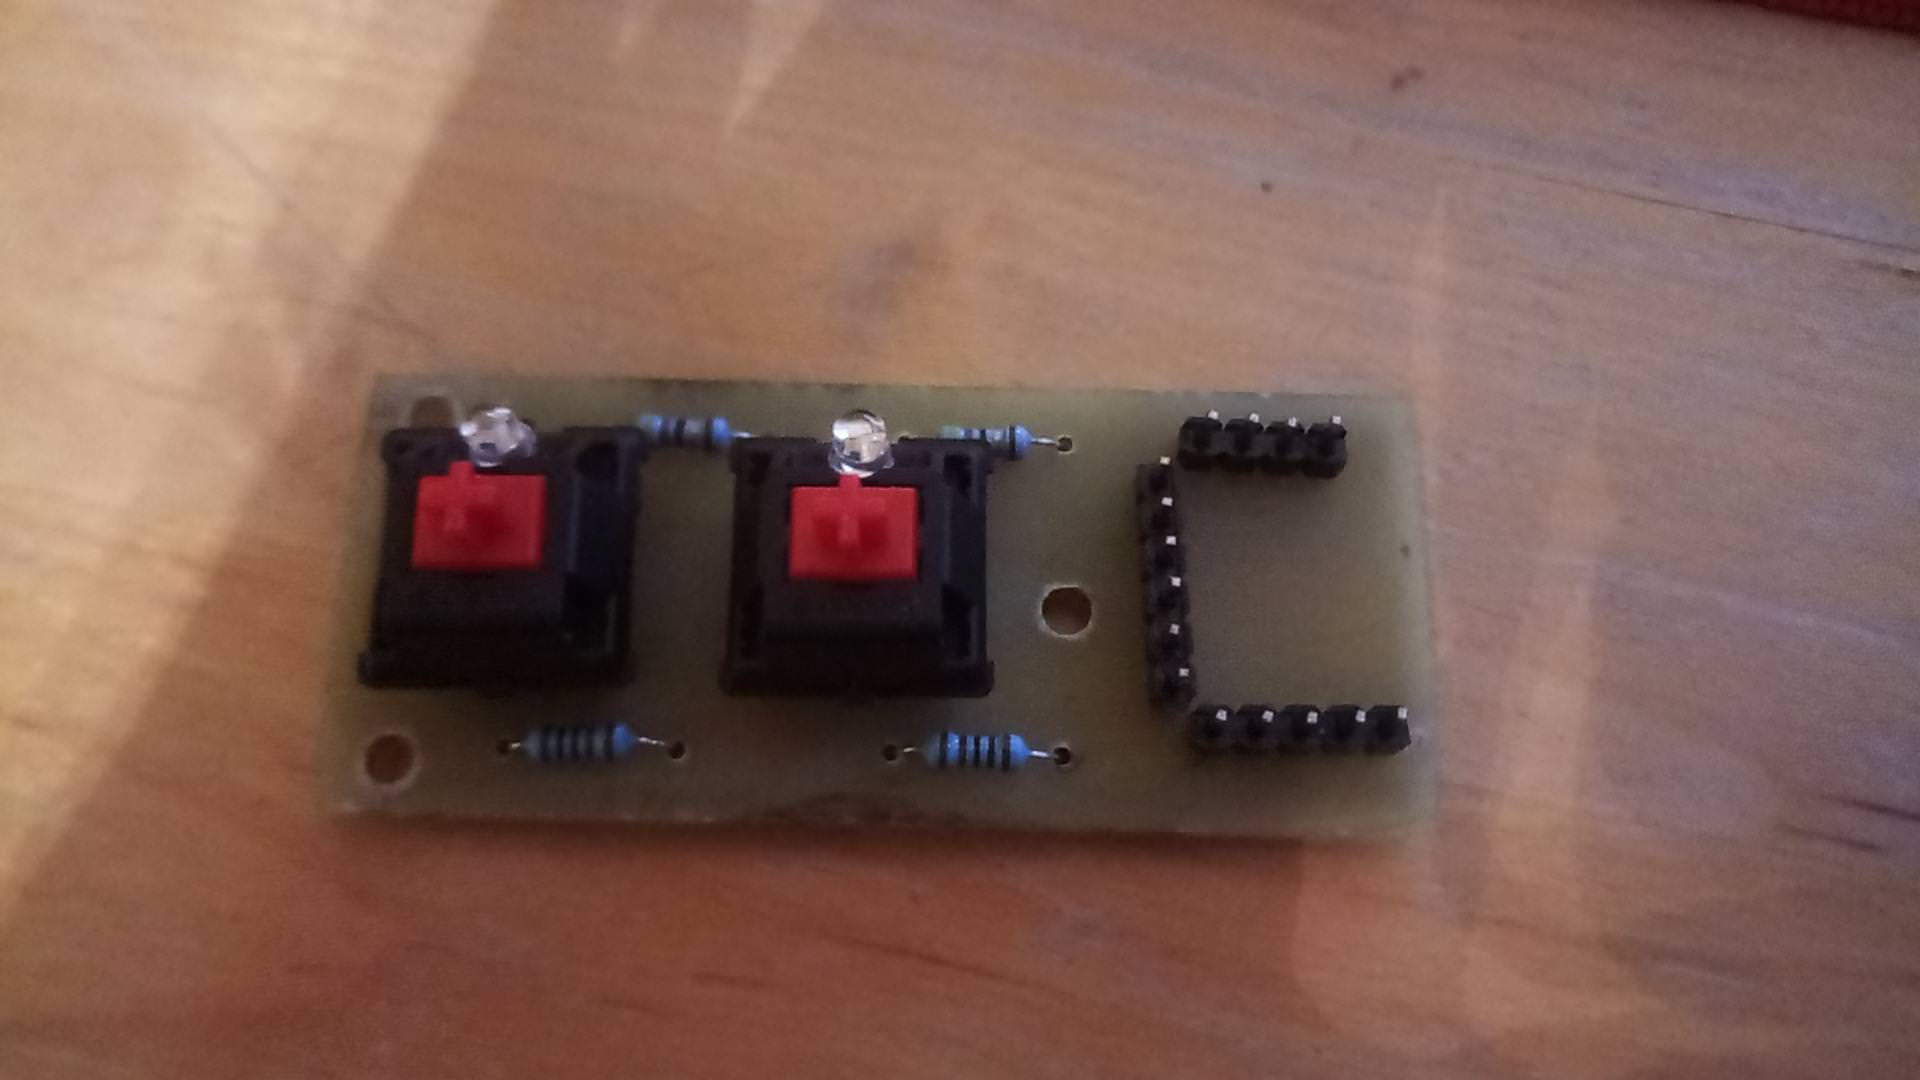
Prewiev:
I often play osu on a laptop but the these keyboards dont have mechanical keys. There are many threats like the osu!nono and you can also buy these 2-Key osu things. But i never found a really good attachment solution. So i made a 2-Key Osu Keyboard (I dont know how to name these) with an male usb A connection. I used the programm Eagle to design the curcuit. If you want to edit it you can do so.
what you need:
If you dont know how to make a PCB your own watch a tutorial on youtube or you can also order them at https://jlcpcb.com they offer you 10 PCBs for only 2$
First you have to build the PCB. Maybe your school has an etching machine or you can order an etching kit on ebay and do it yourself. For that you have to print the circuit. A pdf that you have to print is also in the git so that you dont have to export an print it with Eagle. When you drill the holes also drill the holes for the cherry switches and for the screws.
If you order the PCB at JLCPCB you can use the easyEDA PCB editor. Just import the Eagle file. Then you can edit it if you want an export the gerber files for JLCPCB.
If you have the PCB you can start soldering the different parts on the board. Here is the circuit diagram:
Secure the bolts with the nuts in the holes and adjust the hight so it stands on the ground if you plug it in your laptop. You can also glue a block of wood or something else under the board so that it didnt damage your USB-Port.
When you are finish with soldering its time to programm the mircocontroller with the Arduino IDE. You can grab it here if you havent alredy ( https://www.arduino.cc/en/Main/Software ). Set the Board to "Arduino Leonardo", open the code and upload it.
Then you should be finished.
If you have any questions or improvements write to me!
This is my first threat on osu! and im also from germany so please ignore my bad english xd
Prewiev:
Mine is not finished yet, Im wating for the microcontroller
I will update pictures etc. when i finished it
I will update pictures etc. when i finished it
I often play osu on a laptop but the these keyboards dont have mechanical keys. There are many threats like the osu!nono and you can also buy these 2-Key osu things. But i never found a really good attachment solution. So i made a 2-Key Osu Keyboard (I dont know how to name these) with an male usb A connection. I used the programm Eagle to design the curcuit. If you want to edit it you can do so.
what you need:
- Cherry MX Switches of your choice (I prefer the red ones)
- PCB (printed circuit board)
- 2x 47ohm resistor
- 2x 10kohm resistor
- this thing https://bit.ly/2Pkbqgl
- Keycaps for the cherry switches
- 2x 3mm clear LED (color of your choice)
- some 3mm bolts and nuts
- PCB and Arduino Files (you can download them here http://www.mediafire.com/file/mfky7zcn6k8tc4b/2-Key_osu%21Keyboard.rar/file )
If you dont know how to make a PCB your own watch a tutorial on youtube or you can also order them at https://jlcpcb.com they offer you 10 PCBs for only 2$
First you have to build the PCB. Maybe your school has an etching machine or you can order an etching kit on ebay and do it yourself. For that you have to print the circuit. A pdf that you have to print is also in the git so that you dont have to export an print it with Eagle. When you drill the holes also drill the holes for the cherry switches and for the screws.
If you order the PCB at JLCPCB you can use the easyEDA PCB editor. Just import the Eagle file. Then you can edit it if you want an export the gerber files for JLCPCB.
If you have the PCB you can start soldering the different parts on the board. Here is the circuit diagram:
Secure the bolts with the nuts in the holes and adjust the hight so it stands on the ground if you plug it in your laptop. You can also glue a block of wood or something else under the board so that it didnt damage your USB-Port.
When you are finish with soldering its time to programm the mircocontroller with the Arduino IDE. You can grab it here if you havent alredy ( https://www.arduino.cc/en/Main/Software ). Set the Board to "Arduino Leonardo", open the code and upload it.
Then you should be finished.
If you have any questions or improvements write to me!