Giralda crossplay where
forum
Anime North 2015
posted
Total Posts
445
jonathanlfj wrote:
Giralda crossplay where
Hey guys, we're about done planning the osu! setups in the sheraton, there will be 2 stations to play on. We have a red switch and a blue switch keyboard there as well as 2 tablets (osu!tablet & my CTL470)
You are free to bring your own mouse/headphones/skin on a USB stick! Especially mouse if you are a mouse player as we don't have any gaming mice.
You are free to bring your own mouse/headphones/skin on a USB stick! Especially mouse if you are a mouse player as we don't have any gaming mice.
If you are interested in sharing a hotel room let me know
I'll be able to if the people living in jonathanlfj's room aren't willing to leave lel
Don't count on me though. Try to maybe find other options. If not, I have room in mines.
Don't count on me though. Try to maybe find other options. If not, I have room in mines.
How many people should we stuff in a room?
I currently promised Chippy a space. Princess was also interested in a room to stay. I'm perfectly fine with letting more people into the room as long as everyone can find a way to make it work....
I currently promised Chippy a space. Princess was also interested in a room to stay. I'm perfectly fine with letting more people into the room as long as everyone can find a way to make it work....
Last minute~ But I'll be going and mostly working in the gaming room so I don't think I'll miss the meetup.
I meant that I have a room and if anyone wants the other twin bed and split the cost then they're welcome
I;m gonna be missing on friday because my dad is having surgery in the morning but i'll be there really early sat  !!
!!
 !!
!!To the people bringing their tablets to AN for the weekend:
Please don't forget your tablet pen.

Please don't forget your tablet pen.

I have tablet and pen I can lend (2 actually!) if anyone is interested, didn't know this was a thing
Not going to end up playing today, though I'll definitely stop by later on in the day.
I was there and none of you said hi wow
no one said hi to me eitherFullerene- wrote:
I was there and none of you said hi wow
im too shy
Fullerene- wrote:
I was there and none of you said hi wow
Same, seemed like everyone knew each other, then again I really didn't put much effort into starting a conversation, but it was still fun.Navizel wrote:
no one said hi to me either
im too shy
but Lytessill talked to me, he's a pretty chill guy.
I only know Haneii and Byaku. and then Haneii left. ;~;
I got trolled SO hard by rlc 
Otherwise was fun

Otherwise was fun
It was cool meeting all of you guys at Anime North! Unfortunately I won't be there Sunday because I'm working on my Capstone Project. Some of the cool people i met :>
@apaffy
@Azer
@blissfulyoshi
@Flandredevil9
@jonathanlfj
@Kannagi
@Kibbleru
@ -Soba-
@Staiain
@TrickMirror
@Trust
@- [ U z z I ] -
@YodaSnipe
@Yoshi_green
Hopefully next year I can stay the whole 3 days to hang out with you awesome people . I had lots of fun!!
Sorry if i missed some people in the list!
@apaffy
@Azer
@blissfulyoshi
@Flandredevil9
@jonathanlfj
@Kannagi
@Kibbleru
@ -Soba-
@Staiain
@TrickMirror
@Trust
@- [ U z z I ] -
@YodaSnipe
@Yoshi_green
Hopefully next year I can stay the whole 3 days to hang out with you awesome people
 . I had lots of fun!!
Sorry if i missed some people in the list!
I got autographs of
Azer
Nyquill
Byakugan#####
Sakuya
Meikyuu
Captinnnnn (lied to me about looking Asian)
Trust
KFC < apparently autocorrects from lfj lol
Rlc (massive ass troll)
Fake rlc
Blissfullyoshi's ugly slider art
Mythol
Azer
Nyquill
Byakugan#####
Sakuya
Meikyuu
Captinnnnn (lied to me about looking Asian)
Trust
KFC < apparently autocorrects from lfj lol
Rlc (massive ass troll)
Fake rlc
Blissfullyoshi's ugly slider art
Mythol
osu! panel is still Sunday!
Let the post con depression begin!
..
;_;
..
;_;
The con was a blast guys! It was really fun to meet everyone 

Fun times. I was the guy dressed as ZUN playing taiko at the Sheraton.
p.s. where the hell was the touhou merchandise!?
p.s. where the hell was the touhou merchandise!?
Oh it wasn't just me who couldn't find anything on thatFlaus wrote:
Fun times. I was the guy dressed as ZUN playing taiko at the Sheraton.
p.s. where the hell was the touhou merchandise!?
Think about it this way AzerAzer wrote:
Let the post con depression begin!
..
;_;
there are only 368 days left until AN2016
OMG HYPE
maybe we will actually find chisaki art this time
I didn't know the Saturday meetup was a thing until today... but that was my own fault for not browsing this forum enough  It was fun though, lots of osu! players. It would be cool if we could organize a tournament next year.
I want to see everyone again ~~ ;3;
We should totally do monthly meetups
We should totally do monthly meetups

It was already kicking in before it started ;_;Azer wrote:
Let the post con depression begin!
..
;_;
I got to shake hands with Layne out front on the grass but I went off like 30 seconds after because Staiain was showing me around and introducing me to ppl rip
Weeheee xDBromicon wrote:
I didn't know the Saturday meetup was a thing until today... but that was my own fault for not browsing this forum enoughIt was fun though, lots of osu! players. It would be cool if we could organize a tournament next year.
i have a selfie with RLC
I was there on Saturday, didn't meet up with anyone from here. (I don't know anyone anyways  )
)
But I did end up meeting Cloud 9's EternalEnvy!
But I did end up meeting Cloud 9's EternalEnvy!
Best part about Canada was Tim Hortons
Nice, a Yosafire cosplayStaiain wrote:
Picture time ayy
http://imgur.com/JIVIFf2
Though the horn is on the wrong side.
nametags?Staiain wrote:
Picture time ayy
http://imgur.com/JIVIFf2
i recognize about 6 people
I'm wearing a grey sweater and a blue touquesilmarilen wrote:
nametags?Staiain wrote:
Picture time ayy
http://imgur.com/JIVIFf2
i recognize about 6 people
Yay, one day late post as usual~
I hardly met with anyone this time ;w; #tirednorth
I think there were a lot of good cosplayers this time though~
If anyone was wondering, I was at the KanColle photoshoot, and I was on my way over to Sheraton when something rather unfortunate happened. I had to go and deal with the problem, and I'd hoped people would stick together for longer (like in previous years) but I guess that just wasn't to be.
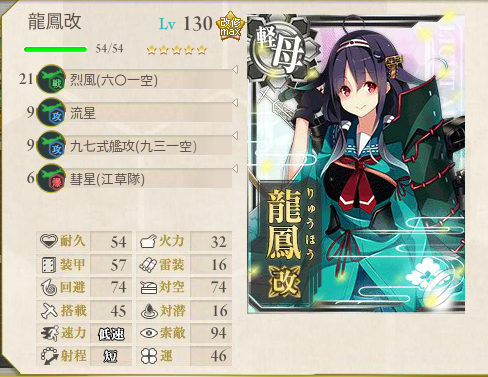
Also, I'm sure not that many of you are actually aware (sadly), but I actually did three different cosplays this year. They were Taigei, Ryuuhou, and Ryuuhou Kai, on Friday, Saturday, and Sunday respectively. All three are variants of the same ship from Kantai Collection. You can see her wiki page and all three forms here!
And you can see me being a ship, right here~
Ughh that last one was terrible. Didn't even do a proper pose and I was too tired to smile ._. We were in a huge rush to check out from the hotel too... The other ones were okay though I guess ;w;
Now I don't have a blog, so I'm actually going to put all the details of the costume and stuff in this post (it's so I can use it for reference). It's already gotten pretty long, so you can just skip the rest if you're not interested.
But if you're feeling bored or want to know more about my cosplay, then feel free to continue reading~
I hardly met with anyone this time ;w; #tirednorth
I think there were a lot of good cosplayers this time though~
If anyone was wondering, I was at the KanColle photoshoot, and I was on my way over to Sheraton when something rather unfortunate happened. I had to go and deal with the problem, and I'd hoped people would stick together for longer (like in previous years) but I guess that just wasn't to be.
For a while now, Touhou has been a pretty rare thing at AN. It doesn't seem too popular around these parts. You'll see Touhou cosplayers here and there, but I don't think I've ever gotten any Touhou stuff from dealer's in 4 years of attending AN besides one art bookGleipnir wrote:
Oh it wasn't just me who couldn't find anything on thatFlaus wrote:
Fun times. I was the guy dressed as ZUN playing taiko at the Sheraton.
p.s. where the hell was the touhou merchandise!?
Also, I'm sure not that many of you are actually aware (sadly), but I actually did three different cosplays this year. They were Taigei, Ryuuhou, and Ryuuhou Kai, on Friday, Saturday, and Sunday respectively. All three are variants of the same ship from Kantai Collection. You can see her wiki page and all three forms here!
And you can see me being a ship, right here~
Ughh that last one was terrible. Didn't even do a proper pose and I was too tired to smile ._. We were in a huge rush to check out from the hotel too... The other ones were okay though I guess ;w;
Now I don't have a blog, so I'm actually going to put all the details of the costume and stuff in this post (it's so I can use it for reference). It's already gotten pretty long, so you can just skip the rest if you're not interested.
But if you're feeling bored or want to know more about my cosplay, then feel free to continue reading~
SPOILER
Oh, and if this all seems really random and you were wondering why I picked Ryuuhou for all of this, yes, she is my waifu.I did say I was tired for that last picture, but the truth was I was pretty much exhausted from the beginning. The reason for that was, well, Taigei/Ryuuhou is a pretty rare, and somewhat obscure character. I normally buy my costumes, but there currently are none being made for her. So I made mines. Everything besides the wig*, pantyhose, apron*, shoes, muneate, and skirts* were either made from scratch or otherwise put together by myself, with some minor assistance~
*there were some modifications made still
Oh, and I had to do it in about a month. I've never made cosplay before either (except for a one tiny instance of practice). It was tough.
Anyways, the first order of business in my cosplay was to put together the seifuku portion of the outfits.
Actually, that was a lie. The cosplay starts with assembling the obscene amount of small parts in Taigei/Ryuuhou's outfits. If you live in Canada and have done cosplay before, you'll have an idea of how difficult this can be when you don't have time.
I've got some pictures of the platform clogs that I chose.
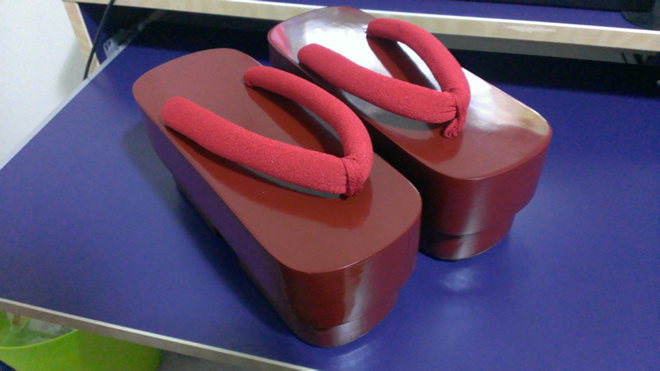
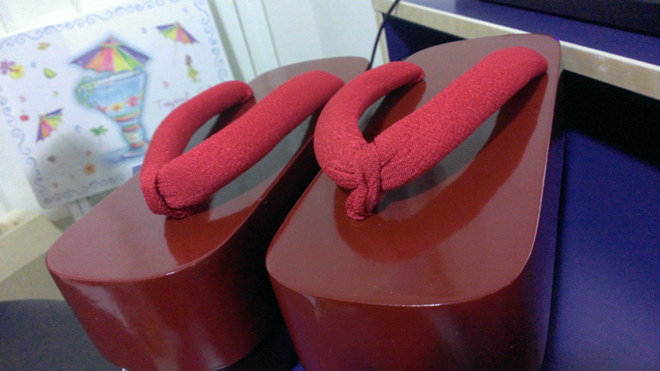
Those things are literally impossible to walk in. If you thought heels were hard, you wouldn't last two seconds with those. People who saw me would've noticed that I was actually wearing heels (my backup shoes) from my Yuyuko cosplay last year.
Anyways who cares about that, look, pattern drafting!
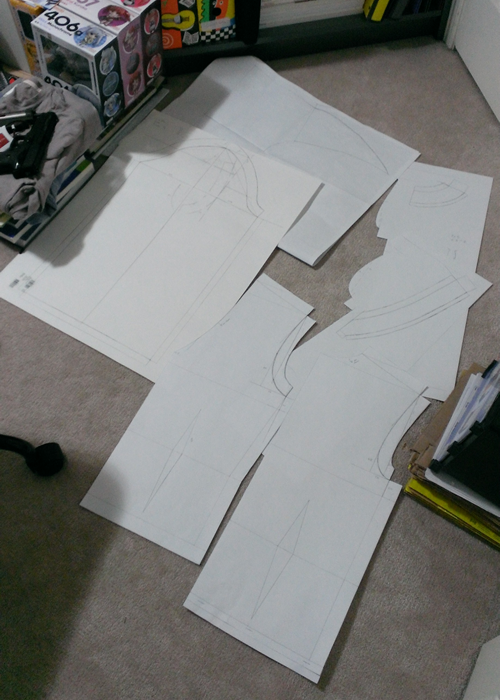
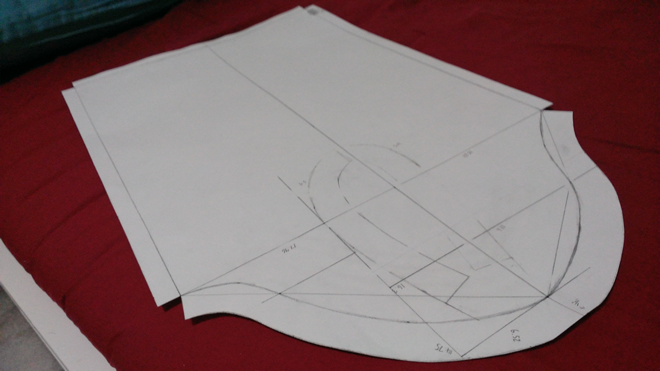
This was actually the easiest part of the whole process. You just measure a bunch of points and draw lines. Finding guides or patterns online may be a bit difficult, but here's the one I used. (sleeves not included)
By the way, there's a really awesome guide that I used for the general seifuku construction, right here. It's extremely well written and I wouldn't have been able to put together my outfit without it.
After the drafting, it was then a matter of putting the patterns on cloth and cutting them out.
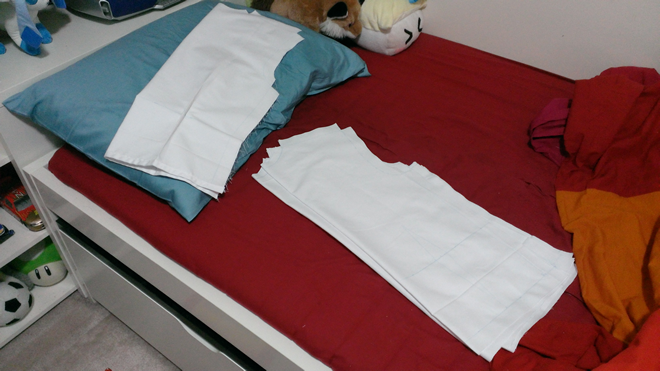
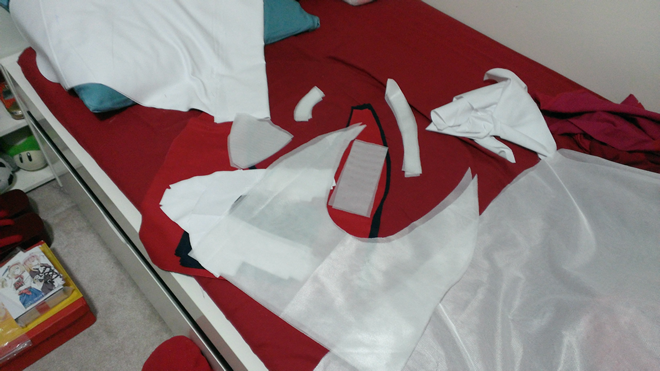
My room quickly turned into a mess.
Meanwhile, satin! Lots of it!
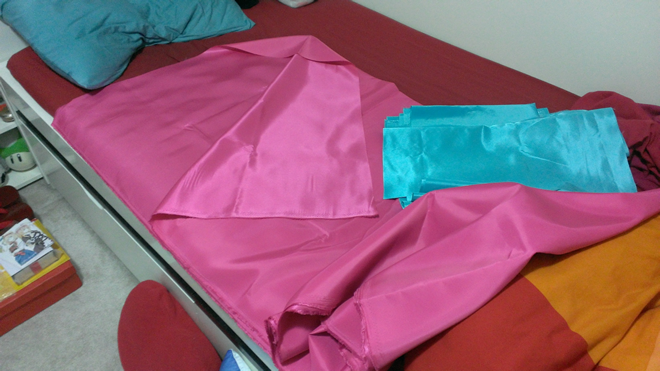
Mmm satin so sexy~
It's actually really difficult to find fabric of the exact right colour. Making cosplay yourself gives you a great deal of control, but the one thing that's still difficult to control is colour, so I'm really happy with this fabric. I actually had to dye the skirt and collar for my Ryuuhou Kai costume - it was an extremely arduous and high risk process. I don't have any pictures of that unfortunately.
I also did the patterns for the haori (the jacket) by myself, and cut the fabric accordingly. It was a bit tricky since I had to work with much larger pieces of fabric. After that, the last big thing that I had to take care of (aside from actually sewing everything together), was getting the patterns printed on the two haori. In addition to this, I printed the whale on Taigei's apron, and Ryuuhou's headband design. So to start things off, I sketched out an interpretation of the sakura patterns from the haori.
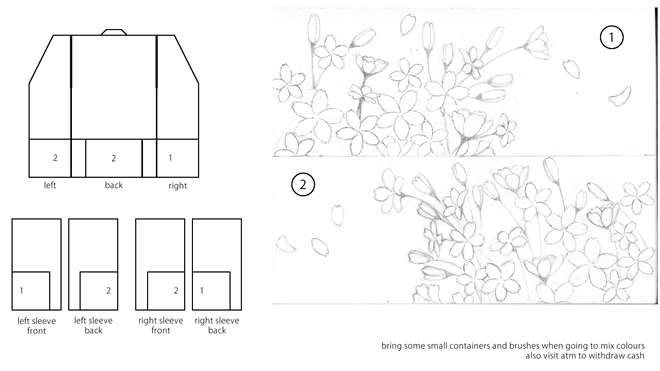
An image with the sketch along with some preliminary planning
Afterwards, I painstakingly traced out the design with vectors, and had it printed on paper.
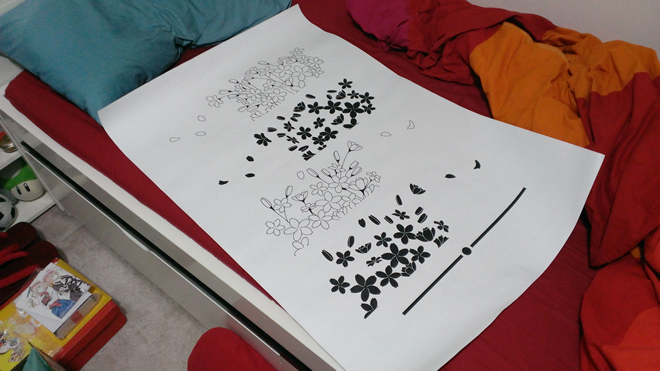
I then took the paper prints to this one place, where I had silk screens created and was able to use those to get the design printed out on my fabric. This was a particularly bumpy and depressing part, so I don't want to go too deep into the details, but you can see the results in these pictures that I took after I was done.
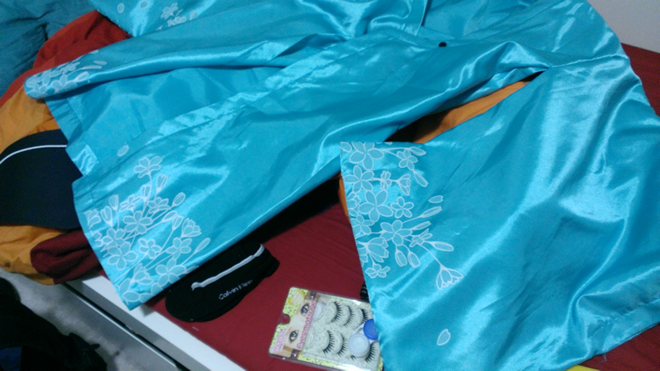
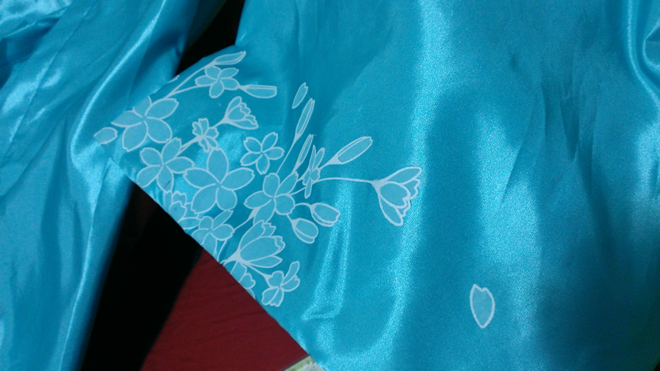
Once the printing was done, it was a simple (hint: that was sarcasm) matter of stitching all the little pieces together on all 5 of my unfinished garments with less than a week to go! If you ever wanted intense thoughts of inflicting self-harm or committing first hand murder, try sewing some sleeves, or attaching some bias tape; the more the better.
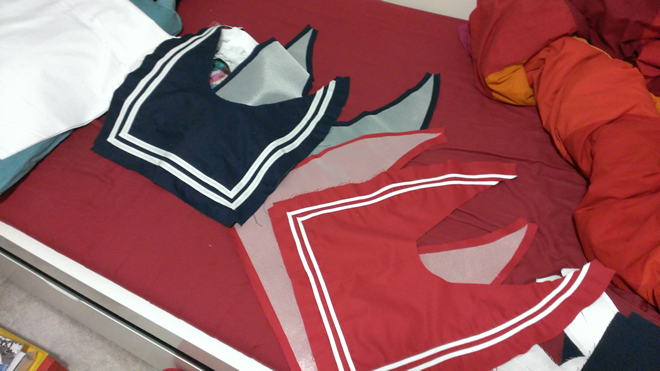
Progress at last
It got pretty painful, and I don't really have any other pictures since I was so busy, but to give you an idea, I basically put together the red ties, attached the whale print, made the headband, did all my packing, and put on my costume for the first time ever on Friday morning. I'd slept from 4:30 to 8:30 prior to that, and the nights before were similar. So yeah, that was kind of why I was tired.
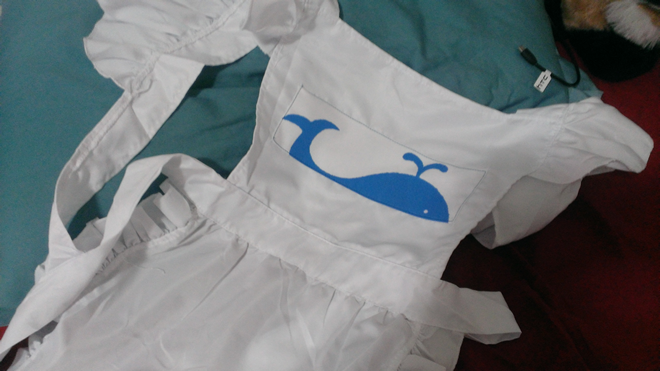
The final stitch.
Oh right, I forgot, I also made my ahoge on Wednesday night. It held together beautifully for the entire weekend and only fell out once. It may sound a bit silly but this ahoge was one of the more uplifting parts of the cosplay~ I particularly enjoyed watching it bounce around as I moved my head back and forth. Here's a quick look with it on my head.
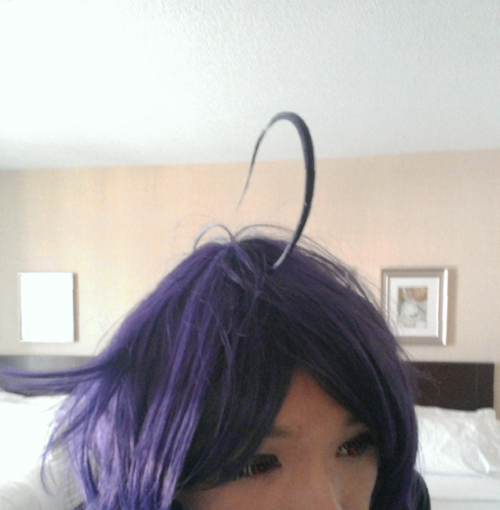
I used the wire method for creating this ahoge. It might be a bit overkill for an ahoge of this size, but you can't go wrong with the rigidity while still having that playful bounce~ This is the guide that I used for it.
So yeah, that's basically it. Hopefully this post wasn't too boring. I'll try to meet together with more of you guys next year~
*there were some modifications made still
Oh, and I had to do it in about a month. I've never made cosplay before either (except for a one tiny instance of practice). It was tough.
Anyways, the first order of business in my cosplay was to put together the seifuku portion of the outfits.
Actually, that was a lie. The cosplay starts with assembling the obscene amount of small parts in Taigei/Ryuuhou's outfits. If you live in Canada and have done cosplay before, you'll have an idea of how difficult this can be when you don't have time.
I've got some pictures of the platform clogs that I chose.
Those things are literally impossible to walk in. If you thought heels were hard, you wouldn't last two seconds with those. People who saw me would've noticed that I was actually wearing heels (my backup shoes) from my Yuyuko cosplay last year.
Anyways who cares about that, look, pattern drafting!
This was actually the easiest part of the whole process. You just measure a bunch of points and draw lines. Finding guides or patterns online may be a bit difficult, but here's the one I used. (sleeves not included)
By the way, there's a really awesome guide that I used for the general seifuku construction, right here. It's extremely well written and I wouldn't have been able to put together my outfit without it.
After the drafting, it was then a matter of putting the patterns on cloth and cutting them out.
My room quickly turned into a mess.
Meanwhile, satin! Lots of it!
Mmm satin so sexy~
It's actually really difficult to find fabric of the exact right colour. Making cosplay yourself gives you a great deal of control, but the one thing that's still difficult to control is colour, so I'm really happy with this fabric. I actually had to dye the skirt and collar for my Ryuuhou Kai costume - it was an extremely arduous and high risk process. I don't have any pictures of that unfortunately.
I also did the patterns for the haori (the jacket) by myself, and cut the fabric accordingly. It was a bit tricky since I had to work with much larger pieces of fabric. After that, the last big thing that I had to take care of (aside from actually sewing everything together), was getting the patterns printed on the two haori. In addition to this, I printed the whale on Taigei's apron, and Ryuuhou's headband design. So to start things off, I sketched out an interpretation of the sakura patterns from the haori.
An image with the sketch along with some preliminary planning
Afterwards, I painstakingly traced out the design with vectors, and had it printed on paper.
I then took the paper prints to this one place, where I had silk screens created and was able to use those to get the design printed out on my fabric. This was a particularly bumpy and depressing part, so I don't want to go too deep into the details, but you can see the results in these pictures that I took after I was done.
Once the printing was done, it was a simple (hint: that was sarcasm) matter of stitching all the little pieces together on all 5 of my unfinished garments with less than a week to go! If you ever wanted intense thoughts of inflicting self-harm or committing first hand murder, try sewing some sleeves, or attaching some bias tape; the more the better.
Progress at last
It got pretty painful, and I don't really have any other pictures since I was so busy, but to give you an idea, I basically put together the red ties, attached the whale print, made the headband, did all my packing, and put on my costume for the first time ever on Friday morning. I'd slept from 4:30 to 8:30 prior to that, and the nights before were similar. So yeah, that was kind of why I was tired.
The final stitch.
Oh right, I forgot, I also made my ahoge on Wednesday night. It held together beautifully for the entire weekend and only fell out once. It may sound a bit silly but this ahoge was one of the more uplifting parts of the cosplay~ I particularly enjoyed watching it bounce around as I moved my head back and forth. Here's a quick look with it on my head.
I used the wire method for creating this ahoge. It might be a bit overkill for an ahoge of this size, but you can't go wrong with the rigidity while still having that playful bounce~ This is the guide that I used for it.
So yeah, that's basically it. Hopefully this post wasn't too boring. I'll try to meet together with more of you guys next year~
I was surprised how nice everyone was and thank you for that. I had the opportunity to talk with a few people for the group before i couldn't handle the awkwardness of not really knowing anyone and not knowing what to say. Hopefully next year i can break out of my shell and be more social.
fun fun
cuteKitsunemimi wrote:
stuff
KRZY wrote:
Best part about Canada was Tim Hortons
post-con depression orz
813 club 4ever
813 !!! <3
Callum ft. Anime North Chorus - Miracle 5ympho X (813 Remix)
eyy 813 forever <3
Really happy that I went. Went with my girlfriend, who actually was the one who suggested going to begin with, back in January. We had a ton of fun. A few of my friends went without me knowing so it would have been nice to know beforehand. Apparently I need to tell people these things. *ahem*
Didn't realized how crazy Streetpasses would be. We got there around 8:45 (we stayed in a nearby hotel so we didn't have to drive down early) and got 10 streetpasses instantly while waiting in line. Then got another 10 as soon as I finished Puzzle Swap and Find Mii multiple times. We both ended with around 210 and likely could have gotten more. We checked whenever we needed a break - which was often - from walking around.
We stayed mostly around the main centre but we likely will branch out next year. Or so is the hope.
Both bought a ton of stuff. Mostly cheap little things under $8 a piece.
We kept to ourselves. My gf knew a few friends who went but I didn't (until after).
Neither of us cosplayed but we might consider it next year.
Only went on the Saturday until 8:00pm - don't think I'd wanna go Sunday and I couldn't go Friday because of work.
Glad I went. =)
can somebody explain 813 to me :X
813 is the meaning of lifeKibbleru wrote:
can somebody explain 813 to me :X