Making Delicious Sliders: A Guide.
There is a growing epidemic of horrible, horrible sliders which make me want to commit suicide over seeing them again, so I am making this to help improve the quality of your curves.
All of these sliders use Bezier Curves - any Catmull slider can be improved with beziers, true story.
There is a growing epidemic of horrible, horrible sliders which make me want to commit suicide over seeing them again, so I am making this to help improve the quality of your curves.
All of these sliders use Bezier Curves - any Catmull slider can be improved with beziers, true story.
Arcs (Use essentially the same technique for any sliders symmetrical in one axis)

This is the easiest shape to make. Place all of your points symmetrically in the grid first of all. Select it and Ctrl+H when you think you have it accurate to make sure the points are on symmetrical grids. Then move the points around until the slider is the right length and falls just a little short of the final point. It's important that whenever you move a point, you move the corresponding point exactly the same way to keep all the points symmetrical with each other. Make sure you Ctrl+H often to check you haven't made a mistake.
To make the sliderend and endpoint line up hold shift to disable grid snap and move the top point down until the sliderend is right on the last point. When you think it's perfect, select and Ctrl+H a few times and see if the endpoint moves around. If it doesn't, congratulations, you have a beautiful slider. Show it off to your friends. If it does, move the top point around until it does.
If you want an arc at an angle, it's usually easiest to make it upright as above, then Edit > Rotate By... to make it the angle you want.
Waves (Use essentially the same technique for any sliders that are rotationally symmetrical)

Waves are made very similarly to arcs, only your points should be rotationally symmetrical with each other as opposed to horizontally flipped. If you press Ctrl + H + J it rotates the slider by 180 Degrees so you can check the points correspond.
To line the sliderend and endpoint up choose two corresponding symmetrical points. Disable grid snap and move them both in by a tiny bit at a time until the sliderend and last point are right on top of each other.
Beat Blankets

Blankets are easiest to do if you eyeball the slider first of all to get it roughly correct, then scroll to a point on the timeline where the approachcircle of the beat lines up with the closest edge of the slider's startpoint. It may help to go into 1/8 snap to get it just right. Then just tweak the points until the whole slider lines up with the approchcircle as perfectly as you can.
Keep in mind that if you want a slider to blanket and be perfectly symmetrical, worry about symmetry first then adjust the points symmetrically to improve the blanket.
Circles (Courtesy of mm201)
mm201 wrote:
The number of control points you want depends on the angle covered by your arc.
0°: 2 points
0°-20°: 3 points
20°-170°: 4 points
170°-200°: 5 points
200°-300°: 6 points
300°-350°: 7 points
None of this is really exact, just a general idea. Similar to waves, the further the control point is from the start/end in order, the further away from the curve it goes. Make sure the first and last control lines are pointed in the direction you want your loop to begin at. The others, just adjust by eye until it's mostly round. Using an approach circle as a guide can help with this.
Like with most shapes, keep one (two if the number of points is even) control point to take out of grid snap so you can line up the endpoint.
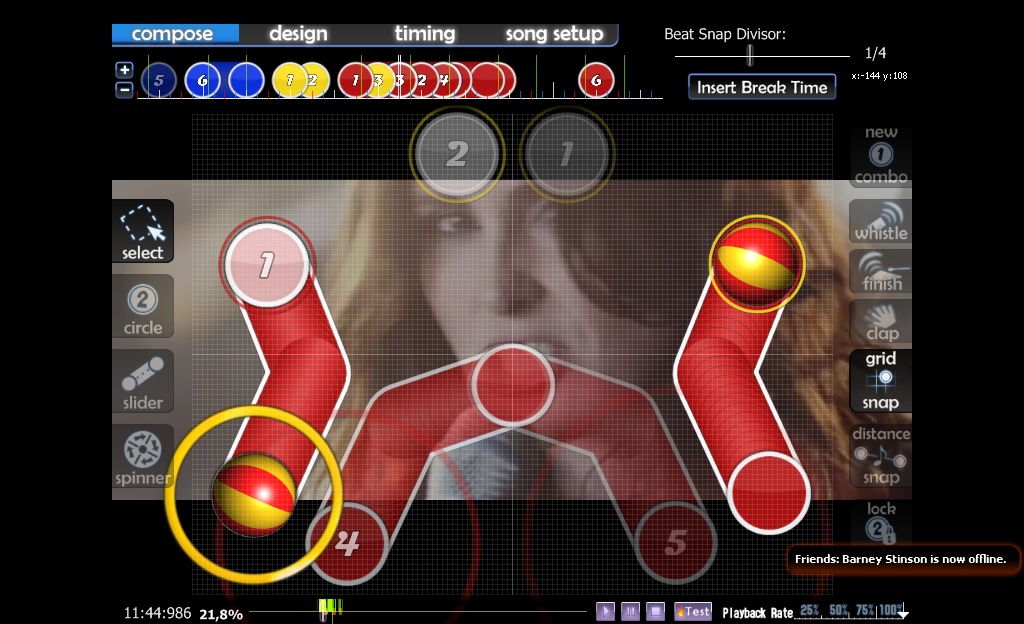
Elbows (Use same technique for any slider with straight bits and curved bits)
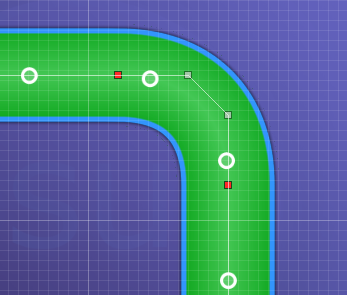
When you want a slider with a transistion between a curved bit and a straight bit you use a red point where it switches. The most important thing is to ALWAYS PUT THE RED POINT AND POINTS ON EITHER SIDE IN A STRIAGHT LINE. Like exactly straight. Get a ruler if you have to. We don't want any sharp bends here kthx. But yeah it's pretty straightforward apart from that.
When you want a slider with a transistion between a curved bit and a straight bit you use a red point where it switches. The most important thing is to ALWAYS PUT THE RED POINT AND POINTS ON EITHER SIDE IN A STRIAGHT LINE. Like exactly straight. Get a ruler if you have to. We don't want any sharp bends here kthx. But yeah it's pretty straightforward apart from that.
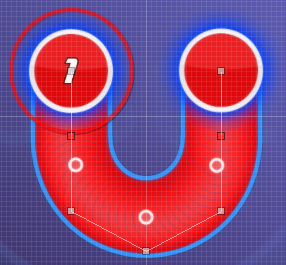
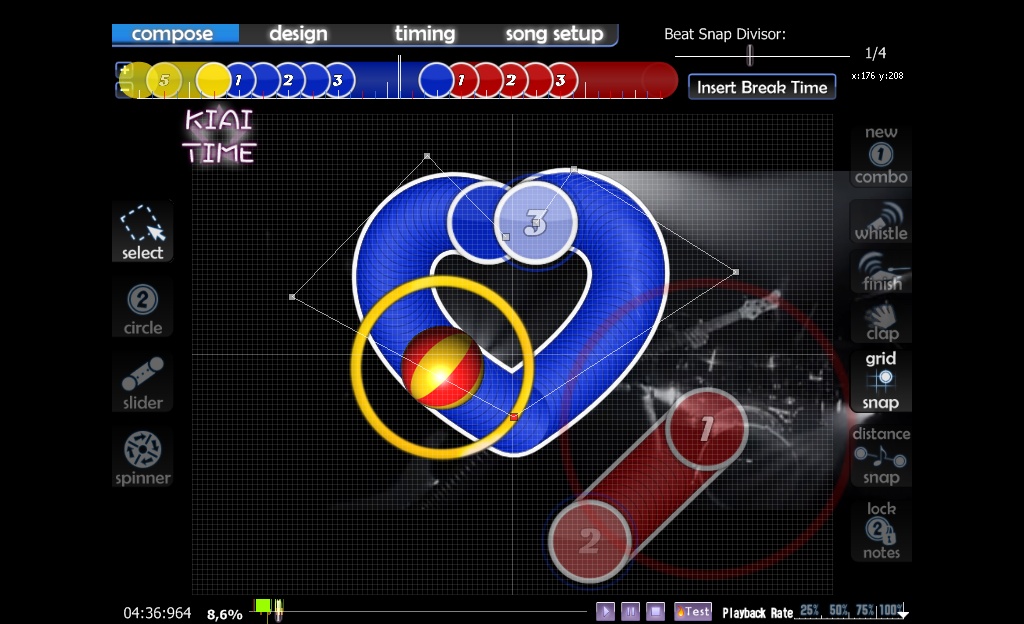
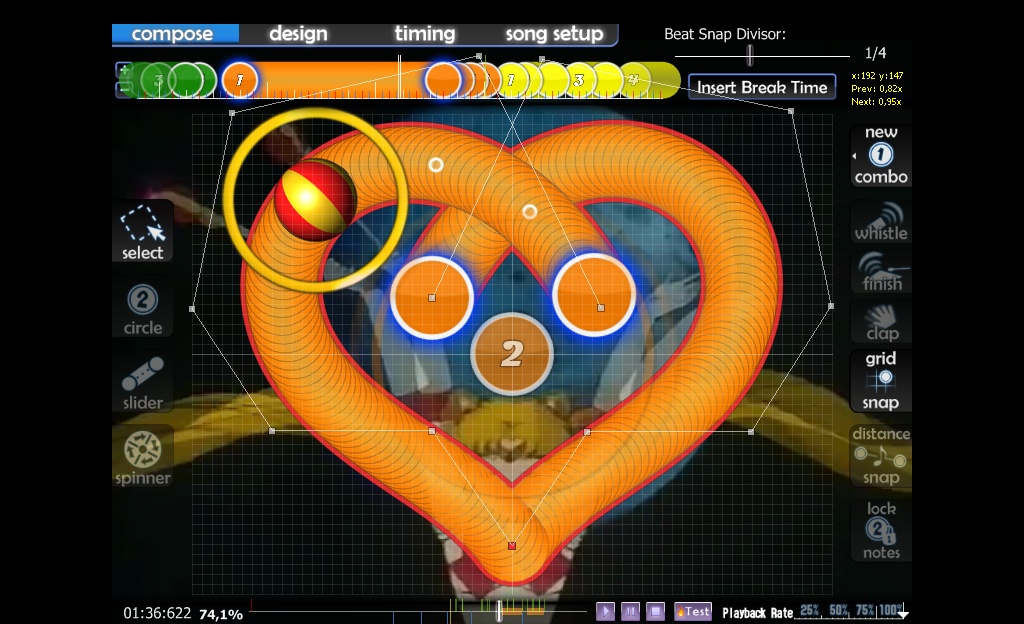
Heart sliders (Use same technique for any slider which is symmetrical, but the startpoint is on the centre line)

Instructions are kinda long, so I've put them in here
First, make a basic heart shape, slightly longer than you need, with both the start and end points in the same place at the bottom. Try and copy these points roughly if you're having trouble. Putting just a redpoint at the top is fine, but I prefer to use an elbow curve 
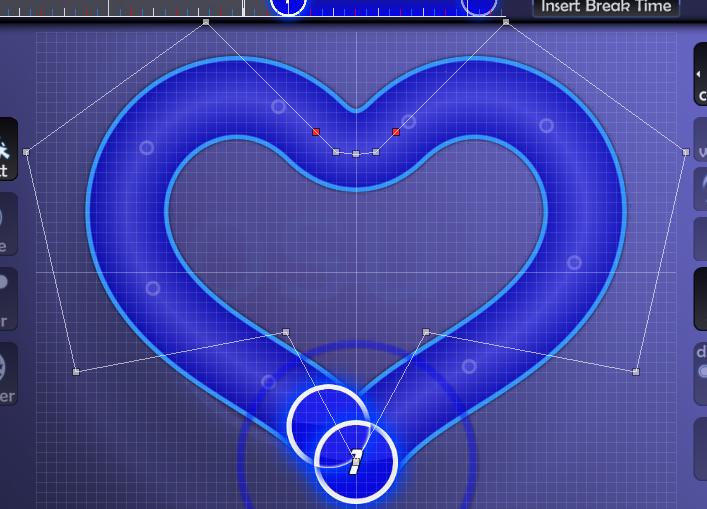
Next, copypaste this slider to the tick immediately after itself and horizontal flip like so

Then grab the endpoint of the first slider and pull it back to the length you want your slider to be.

See how it's asymmetrical and ugly? well mess with the points on the tail half of the slider until it lines up perfectly with the slider behind.

If you managed all that, you're done! Delete the slider behind and edit/scale by if you want to fill any gaps.
Next, copypaste this slider to the tick immediately after itself and horizontal flip like so
Then grab the endpoint of the first slider and pull it back to the length you want your slider to be.
See how it's asymmetrical and ugly? well mess with the points on the tail half of the slider until it lines up perfectly with the slider behind.
If you managed all that, you're done! Delete the slider behind and edit/scale by if you want to fill any gaps.
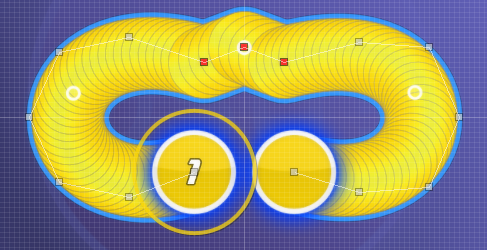
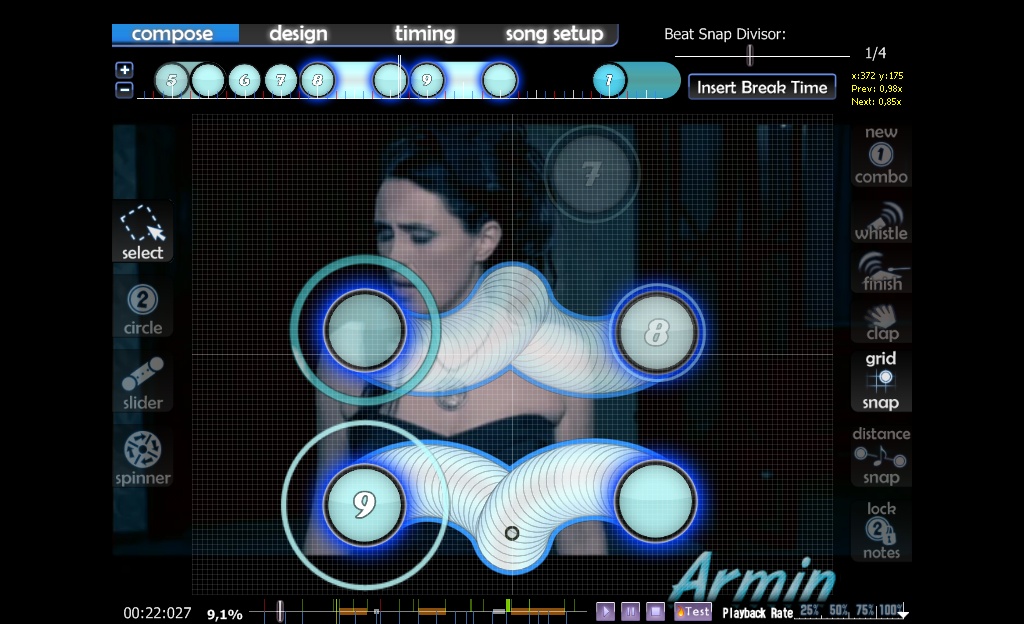
Awesome Wiggles
There are a couple of ways to do this, depending on what kind of wiggle you're after.
Type 1 - Start and end pointing the same way.

The important thing here is that each arc that make up the wiggle is made up of four points, and as you get closer to the centre the taller the four points need to be. Once you have the basic shape, it's just messing around and eyeballing until it looks even and the tail end of the slider lines up on the last point. As with arcs, don't forget to be Ctrl + Hing all the time to make sure the points are symmetrical.
Other than that, it's mostly practice. Once you've made a few nice looking wiggles you'll be able to knock them out in no time.
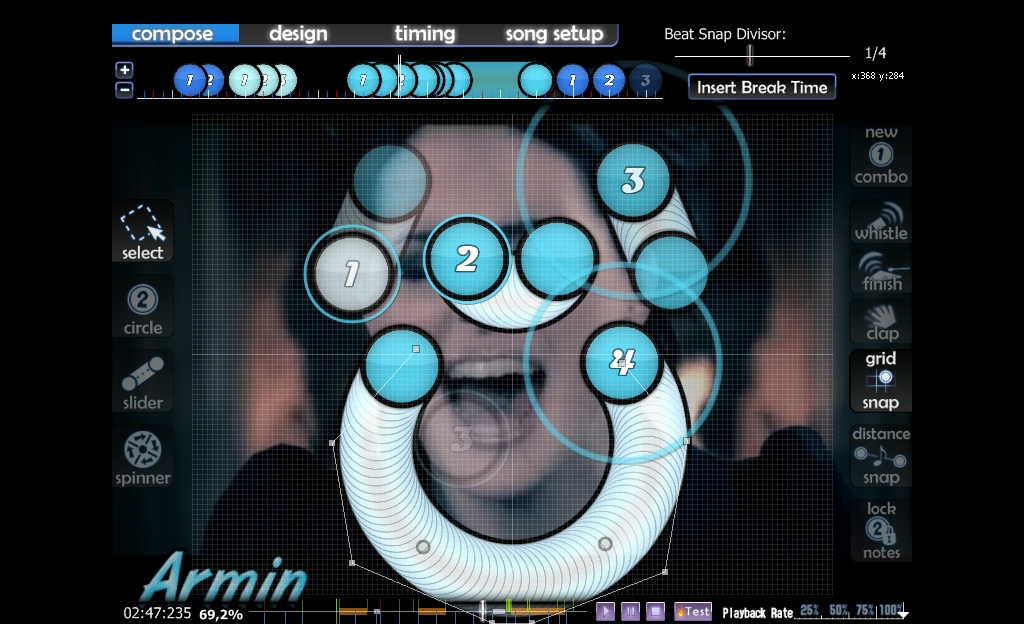
Type 2 - Start and end pointing different ways.

Similarly to type 1, each arc is made up of four points, but in my experience it helps if they're kinda twisted round, like in the image. These are rotationally symmetrical, like waves, so use Ctrl + H + J to check points.
Type 3 - Super Tight Wiggles
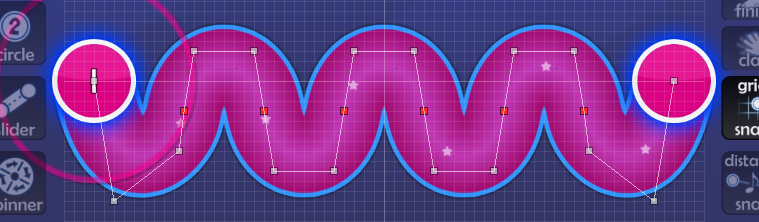
Sometimes wiggles are just too tight to use the above method, so redpoints are neccesary. Make sure that the points of each section between each pair of redpoints are identical, apart from the end ones - you can check this by dupicating the slider and moving them around, checking it lines up all the way along, or by simply counting grids. Also, make sure that each redpoint and the two points either side make a perfect straight line, to avoid unwanted bumps.
The sections towards the end really need to be eyeballed, and should be what you adjust when you want to make the tail end land on the last point. This just takes a lot of messing around, but hopefully you'll get there eventually.
There are a couple of ways to do this, depending on what kind of wiggle you're after.
Type 1 - Start and end pointing the same way.
The important thing here is that each arc that make up the wiggle is made up of four points, and as you get closer to the centre the taller the four points need to be. Once you have the basic shape, it's just messing around and eyeballing until it looks even and the tail end of the slider lines up on the last point. As with arcs, don't forget to be Ctrl + Hing all the time to make sure the points are symmetrical.
Other than that, it's mostly practice. Once you've made a few nice looking wiggles you'll be able to knock them out in no time.
Type 2 - Start and end pointing different ways.
Similarly to type 1, each arc is made up of four points, but in my experience it helps if they're kinda twisted round, like in the image. These are rotationally symmetrical, like waves, so use Ctrl + H + J to check points.
Type 3 - Super Tight Wiggles
Sometimes wiggles are just too tight to use the above method, so redpoints are neccesary. Make sure that the points of each section between each pair of redpoints are identical, apart from the end ones - you can check this by dupicating the slider and moving them around, checking it lines up all the way along, or by simply counting grids. Also, make sure that each redpoint and the two points either side make a perfect straight line, to avoid unwanted bumps.
The sections towards the end really need to be eyeballed, and should be what you adjust when you want to make the tail end land on the last point. This just takes a lot of messing around, but hopefully you'll get there eventually.
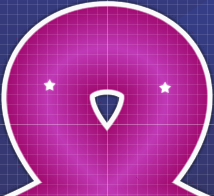
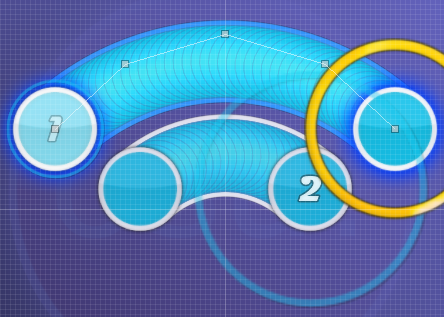
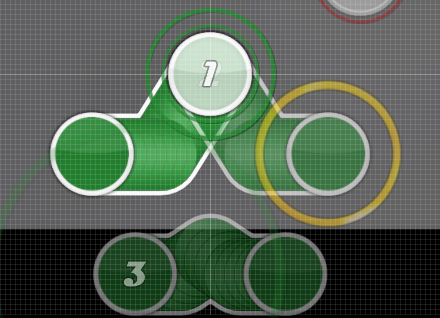
Loops

The things to remember when forming loops is that the points go up a lot further than the loop does: The further each point is from the ends, the further away it needs to be from the slider.
The biggest issue I see with people's loops are the hole. You're looking for an open, rounded teardrop shape like the above slider.
If the hole of the loop looks like any of these, your loop isn't as awesome as the above screenshot:
Wise words from wise peoples
Also, doing this makes reverse selection on sliders not fuck them up. Which is a good thing.Ephemeral wrote:
always align slider endpoints to the smallest possible value - that is, if you drag them any further backwards, the slider will shorten. the point will center itself in the slider end and will make attaining passable curves much easier to accomplish.
Gonzvlo wrote:
As a variation of Beat Blankets, sometimes I use a spinner to make nice circles.
Inspiration Gallery Corner
blame naraku
blame naraku
narakucrimson's sliders of wonderment


"U" Slider:
Semi-elbow:


Awesome wiggle:


Interesting heart-shaped slider:

Slider blankets:
>
>

Creativity is just a click away! (or quite a lot):
You know, creativity:

Self-blanketed slider:

"U" Slider:
Semi-elbow:
Awesome wiggle:
Interesting heart-shaped slider:
Slider blankets:
>
>
Creativity is just a click away! (or quite a lot):
You know, creativity:
Self-blanketed slider:
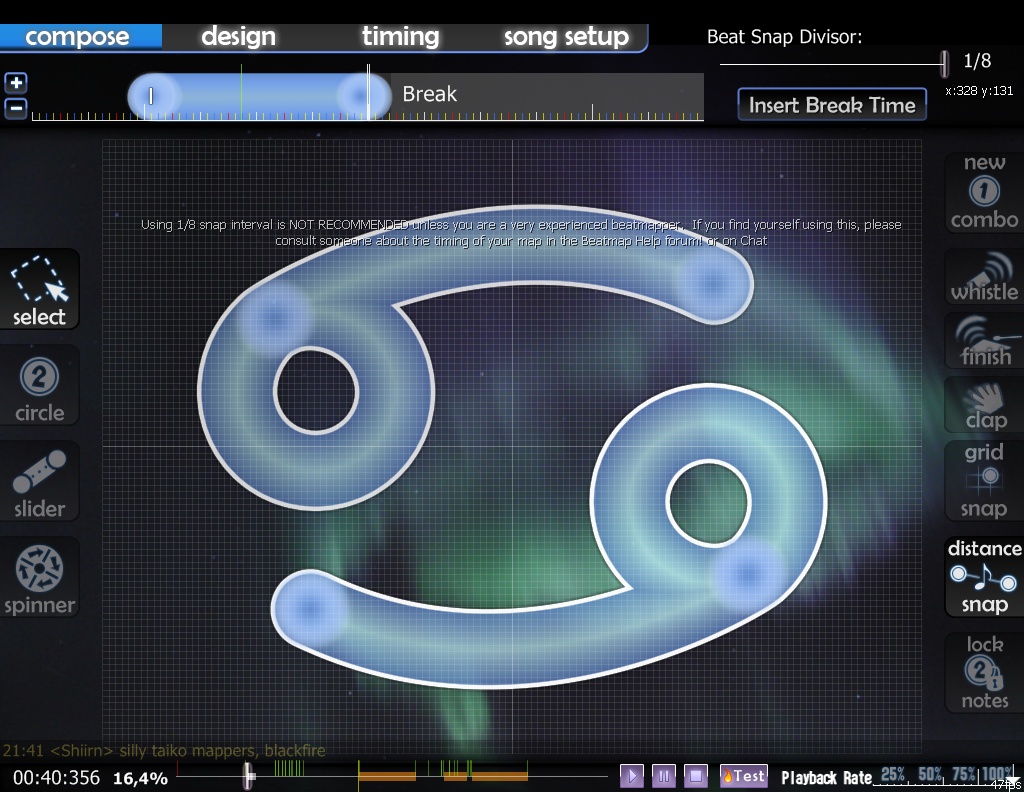
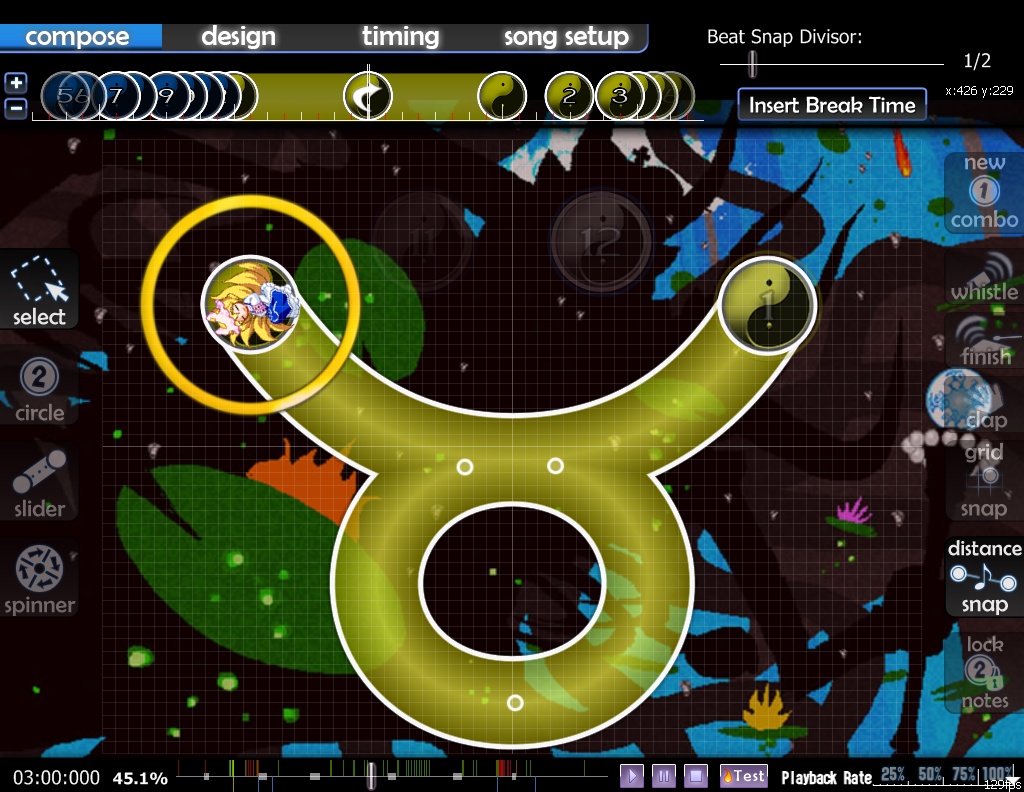
Zodiac Signs
By Krisom
Capricorn

Cancer
Gemini

By Soaprman
Scorpio

Taurus
Capricorn
Cancer
Gemini
By Soaprman
Scorpio
Taurus
Armin's sliders of further wonderment
Xmas' tree

Extended Loops


Crushed slider

Spirals
(with and without anchor points)


Heart sliders
Other stuff/patterns (please read notes where is needed)


 (<- you need to use a velocity slider's varation here)
 (<- classic shape, just with a little varation: there's an anchor point that helps you to make the slider in a short time)


 (for a good flow)
Extended Loops
Crushed slider
Spirals
(with and without anchor points)
Heart sliders
Other stuff/patterns (please read notes where is needed)
