Before you start reading, I want to say that my English is not good, so you might see some weird grammer, anyway, hope you enjoy reading this.
So I end up making my own 2K+2K keypad.
https://github.com/shinkuan/TwoPlusTwoKeypad
How things started
I've been always want a keypad for osu!mania 4K, but those 4k keypad on the market are too close together, I prefer my hands seperate. Even use ZX and 23 numpad, I still feel not far enough, but buying two 2K keypad and let them take up 2 USB slot is stupid and expensive. (Little did I know making this cost me much more than buying 2 2K keypad.)So I end up making my own 2K+2K keypad.
Showcase First!
ヾ(⌐■_■)ノ♪Capabilities
- 2K+2K Design makes your hand confortable.
- Switches are Hot-Swappable.
- Cool PCB art?
How I made it
YouTube is your best friend1.Design PCB
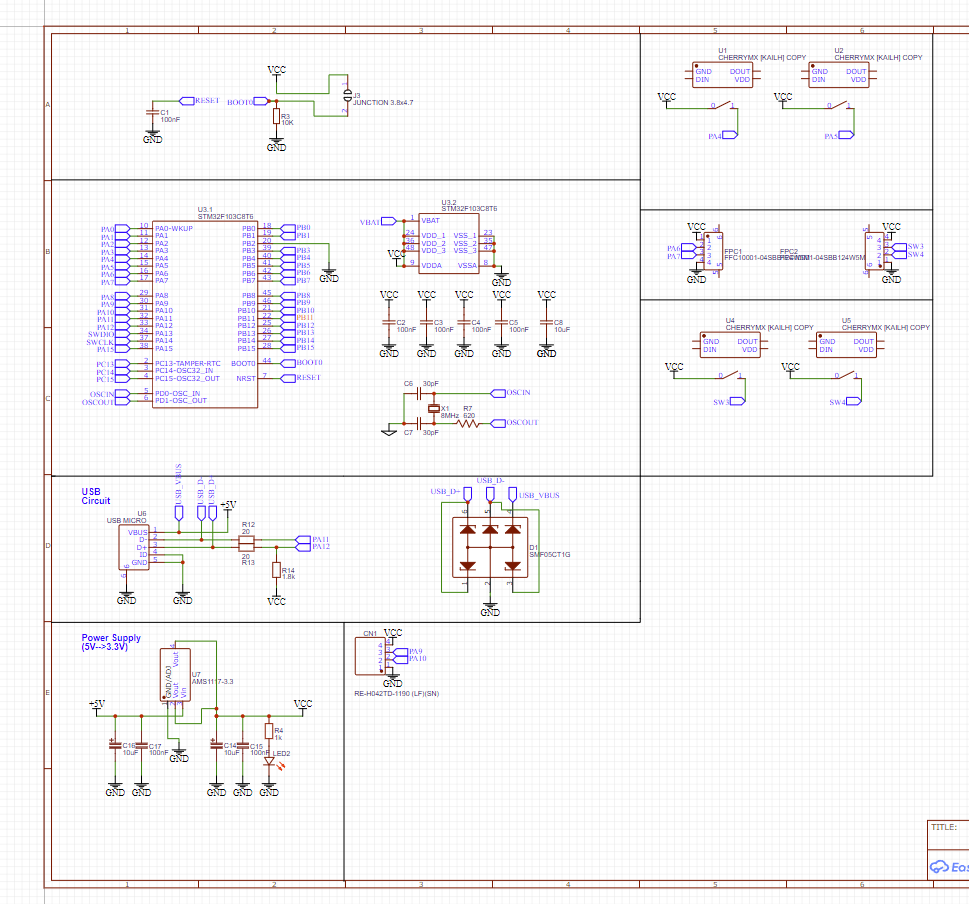
This is hell hard for me, because it is my first time trying to design a PCB.

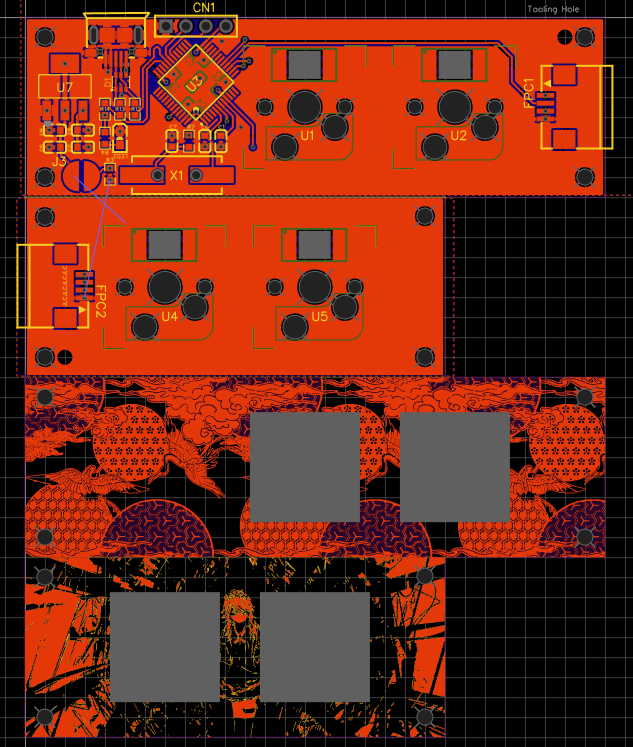
Since the Keypad would look boring without any decorations, and I'm too lazy to design a 3D print case for it. I added some PCB art on it.

That was my 4th version of the PCB design, previous 3 all failed, now you see why this cost me so much money.
Since the Keypad would look boring without any decorations, and I'm too lazy to design a 3D print case for it. I added some PCB art on it.
That was my 4th version of the PCB design, previous 3 all failed, now you see why this cost me so much money.
2.Solder
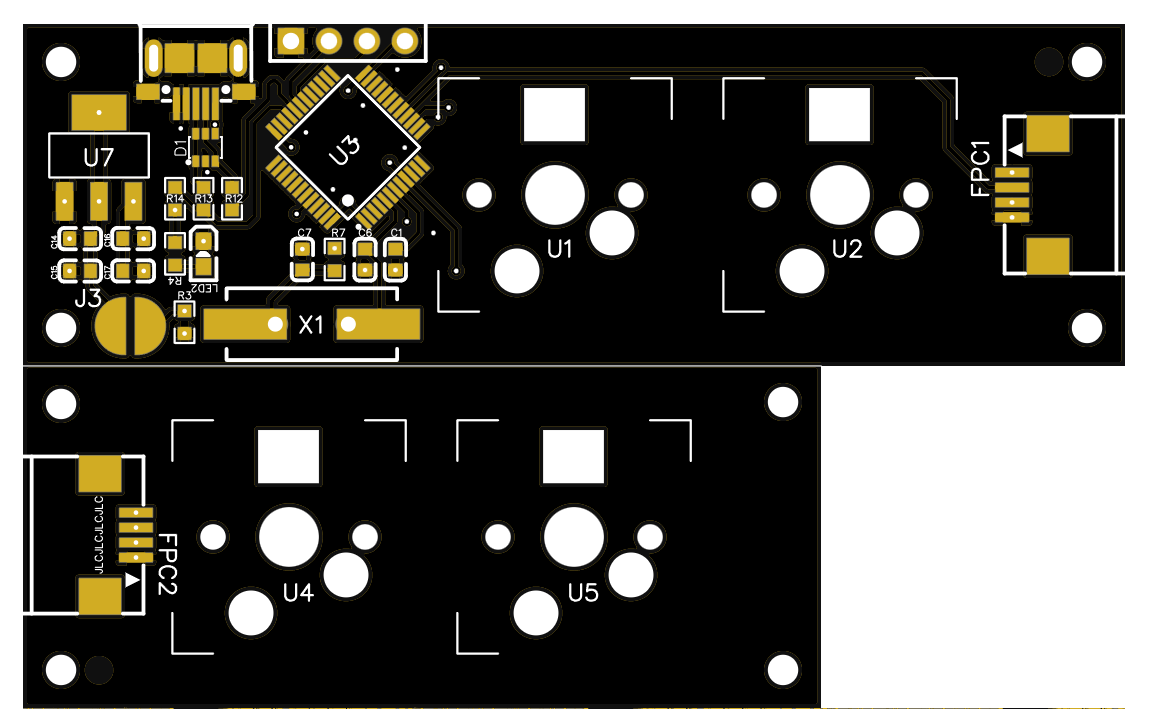
I didn't take picture when I was soldering, but here is a pic what it should look like inside before you solder it.

3.Burn the program into the chip
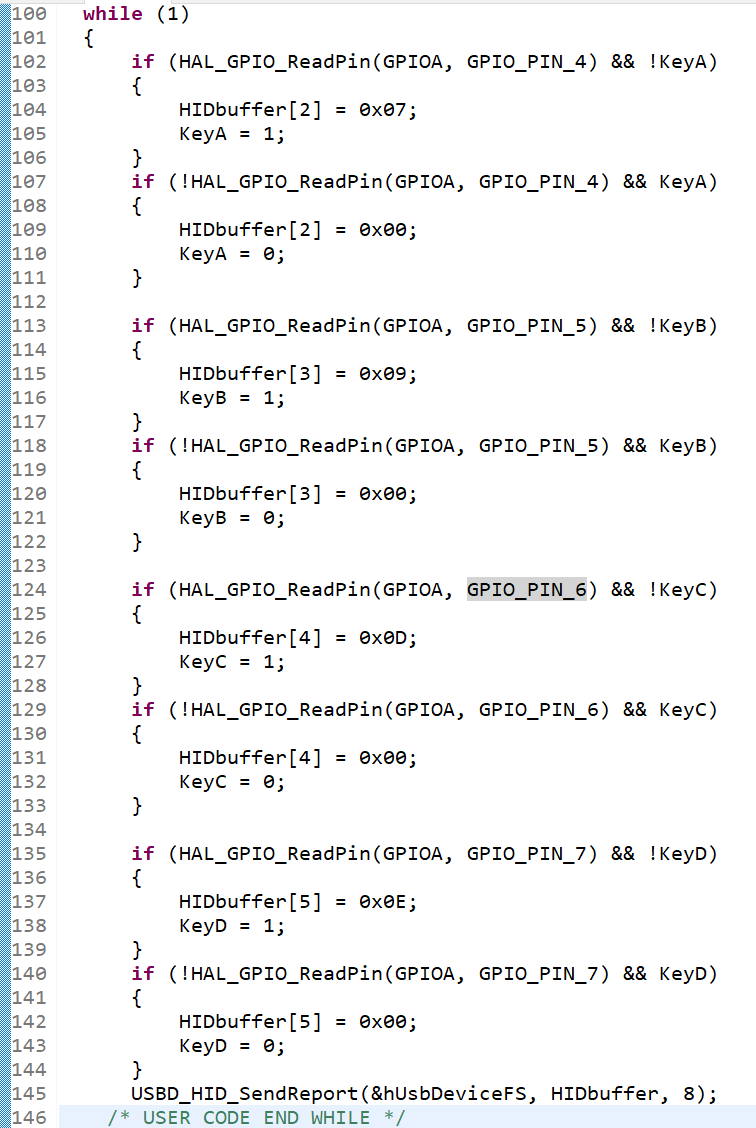
Since I used STM32 chips in this Keypad, I programmed it using STM32CubeIDE.
Main code (pretty easy):

BTW I used pogo pin to burned the program, saved me more space on PCB.
Main code (pretty easy):
BTW I used pogo pin to burned the program, saved me more space on PCB.
4.Assemble
I cut the designed PCB in to 4 parts, since I designed 4 together in one piece to save money.
Use M2 screw and 5mm Copper Pillars to have them locked toghther.
Put your keys on the keypad.
Connect 2K and 2K keypad using FPC connector.
Done!
Sounds easy, but it was really hard.
Use M2 screw and 5mm Copper Pillars to have them locked toghther.
Put your keys on the keypad.
Connect 2K and 2K keypad using FPC connector.
Done!
Sounds easy, but it was really hard.
GitHub
Still configuring.https://github.com/shinkuan/TwoPlusTwoKeypad
Some todo for this project
- RGB
- 6K or 7K version
- A case
- Tell me