Hey! That is a file name, what overlay in list of leaders?
I really can't find him...

I really can't find him...
I think It using the same element with the menu-button-background.png (for the song selection overlay)Vostok Sisters wrote:
Hey! That is a file name, what overlay in list of leaders?
I really can't find him...
With 150 it looks great, thank you!Rio- wrote:
Open your skin.ini and edit the HitCircleOverlap valueRadox1988 wrote:
I liked the font of the circles of a skin so I did copy default-0 - default-9 into the skin folder of my usual skin.
The problem I am having is the skin cant display 2-digit numbers (10 or 11 in screenshot) within the circle.
Someone know what I did wrong or how I can fix it?
Try experimenting the value... The value usually around 0-180.
The more amount you enter, the gap between 2 numbers should become smaller and closer.
...Wanipee wrote:
Hi! i'm trying to make a CTB skin and i need help wit a single thing.
I want to change this fruit-ryuuta.npg for fruit-catcher-fail.png, fruit-catcher-idle.png and fruit-catcher-kiai.png...
do i have to edit something on skin.ini? please help me q_q
MLGnom wrote:
In progress, please wait patiently. (I'm busy with work lately, so it might take some time)
Parts within [x] are done.
But still if you have any questions, go ahead and ask, I will answer them for sure.[1.] Introduction : “I want to make a skin!“
Well nice decision, but remember skinning can be little hard for a newbie. In the beginning of making any skin, you should have :
- Beginner skills with any program that supports transparency (Photoshop, GIMP, Paint.NET, others)
- Patience (skinning can take a little time)
- An idea! Yes, this is important thing. Try be clever while making your skin.
- And of course you need something with you can start work… Here, a skin templates (New skin template is a little incomplete and mixed with old one to fill all missing files, but should be enough to make new style skin).
or
[2.] Skinning Basics :
BasicsWhat is skinning? I need some magical powers to do a skin?
Skinning is a simple picture changing mechanism that osu will load upon selecting certain skin.
Creating skins is easy (creating elements is a little more difficult thing to achieve). First you need to find your “Skins” folder that must be inside your osu! directory. To start creating new skin, install template (download it and just open, osu! will do the rest) rename template folder to your skin name and start editing it. (or copy template skin if you will need it for something).
Actually we have skinning elements for all four game modes :Together there will more than 200 elements to edit (without animations).
- osu! standard,
- Catch the beat,
- Taiko,
- osu!mania
But don’t be scared with the amount of files. You are not forced to change everything.What skin should contain?
Generally - skin elements and skin.ini with is important part of your skin. What is skin.ini I will explain later in “skin.ini” part. Which parts you are going to add it’s completely up to you. Every part that you won’t change, will be taken from default skin.
You are free to add different folders with alternative parts into your skin, osu! won’t care if they are there or not.What is new and old style skinning :
Old style skinning is a style that was used by old default skin (before March 2013).
With “March 2013 update” peppy introduced new default skin and it’s new behaviours and parts.
There were few important changes like new spinner, countdown, hitbursts, ranking-panel behaviour. More about these parts you can read about later.
To active new skin behaviour select this in skin options :
or add to skin.ini "Version:1" to force old behaviour, "Version:2' to force new behaviour.Using elements from other skins :
This is important rule of skinning. Never use other users elements without permission. If you got permission or user is no longer active and it’s impossible to contact with them remember to credit them properly. (Something like : Elements xxx from <name of user>’s <skin/beatmap link/name>). Especially DON’T USE parts that come from skin mixes and “creator” of mix doesn’t know where he get these elements. If you can’t find original creator of skin part (asked some people already, searched in skinning subforum), you shouldn't use it, but as long as there will be note that you are still looking for author of xxx.png, it’s fine.
If you are going to make “skin mix” keep it for yourself or post it on your profile page. We don’t need them in skinning subforum.Parts that can be animated
osu! allows to create animations for some elements. To create animation all you will need to do is creating frame by frame and naming them by <name of part>-0.png, <name of part>-1.png, <name of part>-2.png etc. You are not limited to amount of frames. Exception is only sliderb with is named sliderb0, sliderb1, sliderb2 etc.List of files that can be animated :
If your animation is too fast, you can fix that in 2 ways. First, try to make them longer by doubling frames. For example frame 0 and 1 are the same picture (so picture will last 2 frames), frame 2 and 3 are second picture, etc. This will make animation slightly slower. But it won’t work on menu-back and hitbursts. In that case you need to use “AnimationFramerate” option. Read more about it in skin.ini part.
- followpoint
- fruit-ryuuta
- menu-back
- play-skip
- scorebar-colour
- sliderfollowcircle
- taiko mascot
- taikocircleoverlay
- taikobigcircleoverlay
- hitbursts (300, 100, 50, miss)
- hitcircleoverlay
- sliderb
- Probably few more, will add them when found.
Important information about game mode skins :
osu! standard
Normal - Kind of skin, that skinner creates as he/she wish. Follow or don't follow template sizes. These are often colourful and creative. May contains many different animations. Typical skin for casual player.
Simplified - This kind of skin is directed to a players who dislike distractions, but like to see some things. Skins like this often have minimized size of hitbursts (300,100, 50 etc.), size of parts aren't larger than template's, less colourful, less animations.
"PRO" skins - This kind of skin it totally focused on removing any distractions that skin can provide. Skins like this contains transparent hitbursts, no animations, reduced amount of colours used in it, larger "followpoint.png", semi-transparent hitcircle.Catch the beat
For CtB skins is important to keep droplets large (but not huge) and visible. These are small and is easy to miss.
For catcher you must be careful with plate size. If you make it too short, player won’t be able to play correctly with it since “catching” area is wider. In other hand making it too wide will mislead player and will often miss since catching area is shorter than plate.Taiko
VERY IMPORTANT in taiko skinning is that you must make Don (red notes) and Katsu (Blue notes) visible as possible. Taiko is dynamic game mode and you don’t have time to think if it’s a Don or Katsu.osu!mania
Still gathering data. Sorry!
If someone can provide some info about important things while making osu!mania skins, go ahead and post them here.R-15 and R-18 content in skins :
Probably some of youpervertswould like to make a skin that will contain mature content.
Case is simple, if you are going to post a skin that have it, you are only allowed to post R-15 "ecchi" (suggestive, visible underwear, swimsuits/bikini etc.and you need to avoid adding characters with really skimpy clothing) . Also you must add warning that your skin have these.
You are NOT allowed to post skins that contains any R-18 (nudity,pornography etc.) in skinning subforum. If you post somewhere else in osu! community be aware that you might be punished for that. (But if you release it outside osu! community nobody will hunt you).[3]. What is a skin.ini?
Skin.ini is a necessary file of any skin. It contains several major options of the skin, creator name and name of a skin that show up in osu! Let me explain every line of the skin.ini.Skin.ini[General]
- Name - just put the name and version of your skin here .
- Author – if it’s your skin your name should be here.
- Version: 1/2 Forces osu! to use old/new style behaviour.
- SliderBallFlip – 0/1 this changes the sliderball movement when it meets a reverse arrow. If you switch it off the sliderball will just move backwards after reverse arrow. Explained below.
- Sliderb with turned off flip [0]
- Sliderb with turned on flip [1]
- CursorRotate – 0/1 controls whether the cursor rotates or not.
- CursorTrailRotate: 0/1 – controls whether the cursor trail rotates with cursor or not.
- CursorExpand – 0/1 when turned on, the cursor expands when clicking.
- CursorCentre – 0/1 while turned off the action point of the cursor will be in the top left corner of the image, rather than the center.
- SliderBallFrames – amount of sliderball frames(pictures) used in the skin.
- HitCircleOverlayAboveNumer – 0/1 if turned on, makes numbers appear under the “hitcircleoverlay”
- ComboBurstRandom : 0/1 – makes combobursts appear in a random sequence.
- AnimationFramerate: "Number of frames" – Defaults to playing all available frames per second. Applies to all animated sprites except slider ball, hitbursts. The lower amount of them, the slower animation will be.
- CustomComboBurstSounds: 50,100,200,300,400,500 etc. – Originally this option was intended for Taiko, since you can't change combobursts combo. Combo sound will be played at specified combo number. For example, we set CustomComboBurstSounds: 20,60,150,432, 864,1000 - combo sound/sounds will be played at combo : 20,60,150,432,864,1000.
- SpinnerFadePlayfield: 0/1 – If this is set to 0, background of spinners will be transparent (you will be able to see map playfield/video). Example how it's work. SpinnerFadePlayfield: 1 and SpinnerFadePlayfield: 0
- SpinnerNoBlink: 0/1 – When set to 1, it will stop spinners from "blinking" at top of the metre as they rise/peak.
- SliderStyle : 1/2/3 - Changes the slider style.
Slider style :1
Slider style: 2
Slider style: 3 (Right now this one is disabled)
[Colours]
Every colour is defined as a R,G,B palette.
- Combo colours – allows you to use skin hitcircle colours if the beatmap used default. You can use up to 8 colours.
- SliderBorder – changes colours of the slider border
- SliderTrackOverride – Forces osu! to use certain colour for slider. For example :
SliderTrackOverride: 150,25,25- MenuGlow: 0,0,0 - changes the colour of glow around osu! logo in main menu. This is supporter only feature.
- SpinnerApproachCircle – Changes the colour of SpinnerApproachCircle.
- SpinnerBackground: 255,255,255 - You can use this option to change colour/dim of spinner background while using old style behaviour. Read more in this post.
- SongSelectActiveText: 0,0,0 – Changes text colour on actually selected difficult.
SongSelectActiveText: 247,135,27- SongSelectInactiveText: 0,0,0 Changes text colour on actually selected song (but not selected difficult).
SongSelectInactiveText: 0,0,0- StarBreakAdditive: – Changes the colour of star2.png (dropped by cursor) during breaks and kiai time. Hard to explain this correctly, read more about this in ziin's post.
Normal star2.png :
Changed colour with skin.ini (StarBreakAdditive: 0,255,0) :[Fonts]
This allows you to manipulate the number images. About that “overlap”, the higher it is - the closer the numbers are.
Default numbers are used on hitcircles.
Score numbers are used for score and ranking.
Also swapping prefixes can influence the custom skins in beatmaps.
- “HitCirclePrefix : default” – changing this to “score” allows you to use one kind of number.
- “HitCircleOverlap: 3”
- “ScorePrefix: score” - changing this to “default” allows you to use one kind of number.
- “ScoreOverlap: 3”4. Standard skin elements.
The main point of skinning. It’s good to keep the image sizes the same as on the originals, but this is not a rule. I will present and explain every part of standard skin elements.ApproachcircleApproach circle is important part of gameplay. It is a circle that tells you when you need to hit a circle. Approach circle uses same colours as hitcircle so try to make it grey-scaled or preferably, white. While using "Hidden" mod approach circle is... well... hidden.
It's recommended to keep shape of circle or something similar to it, since player may get confused.
Few examples :Button-left, Button-middle, Button-rightThis is skin part for buttons that you can find in several places in osu!, like mods selection menu, beatmap options, multiplayer/match buttons etc.
As you can see, every button is made of 3 parts. Left, middle and right. You need to be careful to made them at same height. To have correctly aligned parts remember that button-left must be connected to the right side of picture workspace and button-right to the left.
While adding any pattern/objects to it, remember that in some places button is resized... it can look a little ugly.ComboburstsCombobursts are characters that appears at specific combo from left or right side of screen. Recommended size is 768x500px but you can do it wider. Remember to make the comboburst characters (or whatever it is) appearing from left side while in the folder. Also adding any text to combobursts does not work well as osu! mirrors the images when they appear from the right side. To add several combobursts follow this naming rule : comboburst-0, combourst-1, combobursts-2, etc.
I have noticed one thing, many people simply don't know how to correctly crop a character out of picture and they are just using magic wand tool and delete selected area... please don't do that! It often leave many white parts or even removes something from your character... If you don't know how to cut your character out of picture, please check these 2 small tutorials:
Cropping tutorial for "Complicated Backgrounds" and Cropping tutorial for "Simple Backgrounds"
Few examples of combobursts :
 CountdownCountdown is a part of some maps. It's give warning to prepare for playing map.
After last wide-screen update creating countdown should be a lot easier.
You are not restricted by width of count pictures but height should always be 768px.
How positioning of counts works :
Count 3 - Anchor position of it's at left side. Left side of picture will start here.
Count 2 - Anchor position of it's at right side. Right side of picture will start here.
Count 1 - Anchor position is at centre of screen. Centre of your picture will be here.
So, with this you are able to create many different countdowns. But you need to remember about how they are layered. Count 3 is always on top, count 2 is behind and count 1 is covered by them. So it's kinda impossible to make stacked countdown (you know numbers that appears on previous one).
Examples : (to be added)
To countdown we can also add go.png and ready.png . Not much to say about these.
You are not restricted by size so you can try to make something different than default "Go" and "Are you ready?".
Example of different go.png :Cursor and Cursor trailCursor is most important part of standard mode skinning.
Every player have their own opinion about cursors and what kind is the best.
While making one you should do it in kinda different colour than skin uses, to make it visible as possible. Cursor-trail can help increase visibility of cursor
By turning off skin.ini option "Cursor Centre" you gain possibility to make cursors that acts as your Windows cursor.
Examples of cursor : (more to be added) Default numbers and Score numbersDefault numbers - These numbers are used on hitcircles, as counter for actual circle combo. Kinda misleading naming, don't you think? Be aware of using something else than arabic numbers. Might be a little complicated with combo 10 and up (Roman numbers for example, it's impossible to make 10 as X, 11 as XI etc.).
Score numbers - Numbers used for score and your actual combo. You should try to make these large as template numbers. Too small may by hard to see, too large will be distracting and may look ugly. Remember that score numbers are also on ranking screen, making them large will complicate creating ranking panel.
When you are using widescreen resolution, don't forget about people that plays on 4:3 aspect ratio. You can easily make numbers a little larger and lifebar will start to cover them.
You can fix that by editing Score Prefix in skin.ini
Examples of numbers : HitburstsHitbursts are "explosions" that appears in front of correctly clicked circle, slider, spinner. In other words - 300,100,50 and miss.
This is very important part of standard mode skin. It can really affect how can you play (or think you are playing ^^;). NEVER do them larger than template hitbursts (I haven't meet a person that would like them being huge).
Let's begin with small gameplay explanation how you are getting 300k or 300g.
300.png - you are getting this one for correct hit at note/full slider or finished spinner.
300k.png/100k.png - "Katu" is for correct hit at last note of combo chain but you have got somewhere 100 (green katu is for hitting last note incorrectly).
300g.png - "Geki" is for correctly finished combo chain (you have gained 300 for every note in combo chain)
As you know from "Basics" section, people have different preferences. Making small or blank hitbursts it's kinda easy but making something creative but still not that distractive might be a little harder. I will show few examples :
Hitbursts can be animated, simply like other animations - hit300-0.png, hit300-1.png,hit300-2 etc. but remember that animation will be fast and is not affected by "Animation Framerate" from skin.ini.Hitcircle and HitcircleoverlayHitcircle and Hitcircleoverlay are another key parts of standard skinning. Together with default-numbers creates standard hit note :
While making hitcircle remember about combo colours. Avoid using too much black colour since can make it unreadable.
Some people likes when hitcircle it's semi-transaprent, it helps them read streams etc.
Hitcricleoveraly - use it to make your hitcircle readable! It isn't affected by combo colours so you can make them in whatever way/colour you want.
Remember to make it slightly larger than hitcircle.
Few examples of hit notes :

 HitcircleselectHitcircleselect is a sprite for "selected object" in beatmap editor.
It's a blue glow on the picture.LightingLighting is part of hitcircle. It appears behind hitcircle after hitting it. You can also see it behind circle when beatmap have kiai time.
Please, try to avoid making it very large, since it's expanded after appearing. If you want it to be visible behind hitcircle in kiai time, simply make it a little larger than hitcircle.
In default skin it's just a glow :
Lighting is also visible in kiai time while playing CtB
Examples of lighting : Menu-backButton that appears in any menu (options, osu!direct, special mode select, song select). This is one of few parts that have size restricted. If you make it any larger than template, part of it will be outside screen. You can also animate it.
Examples :
 Menu-button-backgroundThis part appears in few places, but main usage is in song selection screen as background for beatmaps info.


While making menu-button-background you must remember about few things.And few exmaples :
- Don't make it too large because it will look ugly when things start to overlap.
- It's coloured differently, try making it grayscaled or just avoid using too much of dark colours.
- You can try to be clever while making "bars" for songs names.
- You can change colour of text used, look into skin.ini part for SongSelectInactiveText and SongSelecActiveText:

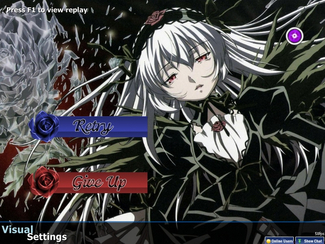
 Pause/Fail screenSkinning pause or fail screens it easy. Only few elements are used and it's widescreen compatible.
So, let's begin with background. For pause background you need to skin pause-overlay, for fail - fail-background. If it's a personal skin, use your osu! resolution as size (as long as it uses more than 768px height). If you are going to make public skin, you can do 2 versions of it - one in 1366x768 size, second in 1024x768 but using 1366x768 is the safest option since on lower width resolutions, sides of picture are cut (while 1024x768 have black bars at sides). Default skin doesn't have pause/fail backgrounds.
Another parts are pause-continue, pause-retry, pause-back (fail screen only have retry and back). These aren't restricted by size and clickable area is resolution of picture.
Examples of pause :

Examples of fail :
 PlayfieldPlayfield as the name says it's a background of our playfield. Actually it appears really rarely, only on old maps that doesn't have their backgrounds. But it also serve a purpose of ranking-panel background. But I will tell more about this in ranking-panel section.
Playfield is widescreen compatible, you can use any aspect ratio since osu! resizes 4:3 pictures to fit screen on widescreen, and while using widescreen bg on 4:3 it's adding black bars from upper and bottom panels.
Default playfield :Play-skipSimilar part to menu-back with one exception, is not restricted by size. Used to skip beginning of some beatmaps. This part can be animated.
Default :
Examples :
 Play-warningarrowWarring arrow that appears at the end of section break (pass or fail), in pause menu - pointing at actually selected button (appears after pressing keyboard arrows) and while playing TAG in multiplayer - warns about your turn. Remember that warning arrow appears from both sides, right side is mirrored.
Default :
Examples :

 Ranking-panelRanking panel uses many skin which you can create pretty nice thing.
Default ranking panel :
So, let's begin.Examples of ranking :
- Ranking Letters - It's not hard to do them. Just don't make them freaking huge. Remember ranking-X is for SS, ranking-SH - Platinium S, ranking- XH - Platinium SS.
- Ranking-accuracy and maxcombo - As the name says. Personally I recommend to make them blank and add "Max Combo" and "Accuracy" by yourself on raking-panel. It's just easier to position them.
- Ranking buttons (retry,back,replay) - Similar part to pause buttons.
- Ranking-graph - This one is kinda size and position restricted. Easiest way to make it, is by using default one, since you won't have problems with correct position to fit actually showed graph.
- Ranking-perfect - You can make it in whatever way you want, add text or picture. Be aware that sometimes you will need to do minor positioning.
- Ranking-title - Title of Rankings. Usually used as "RANK / Your Rank".
- Ranking-winner - A small box that shows winner of multiplayer match.
- Ranking-panel - the heart (:3) of ranking. It's not restricted by size (but is restricted by position), so fell free to experiment. Like I said in "score numbers" part, you must remember that is hard to fit large numbers into ranking spaces. I recommend to test your ranking on long maps that have high combo (for example paraparaMAX I, just check out someone's score).
- Background of ranking - After widescreen update, creating ranking panel of 1024x768 size to cover whole screen doesn't work well. Instead now the main role of background takes playfield.png


 Scorebar (lifebar)This is troubling for most of the skinners if they want to make lifebar different than the original. That's because scorebar-colour has different anchor position than scorebar-background.
Blue lines show the anchor position for scorebar-colour and if you want to fit them in the same place, try moving the scorebar-background. Also you don’t need to keep length of the lifebar, you can make it shorter or longer (for widescreen). Scorebar-colour can be animated.
Default lifebar :
Interesting thing about scorebar-background is lack of size restriction with you can use to make some kind of border for combo or score. I will provide example, so this should be easier to understand :
This is more like option for personal use, since you need to make it in your aspect ratio size. For this example was 1311x768, for 16:9 will be 1366x768 etc.
Some people might like this option since someone would like to cover score or something. Be aware that scorebar-background is a highest layer of gameplay which means it will cover any other aspect of screen.
Scorebar-ki/kidanger/kidanger2 - part of lifebar that's goes with your actual life. Ki is from 50-100% of life, kidanger appears at 25-50% life, kidanger2 appears when player have less than 25% of life.
Examples of lifebar :
Section Pass and Section FailPictures that appears in longer breaks. You can gain section pass for having more than 50% of life before break. Section Fail appears while having less than 50% of life. Nothing special about these, they don't have size restrictions so fell free to make them larger.
Default :
And of course examples :
Pass:


Fail:

 Mod iconsAs name says, icons for addition mods that make game easier/harder etc.
List of actual mods :You can also find 2 other icons in older skins that aren't used any more : selection-mod-novideo and selection-mod-taiko.
- selection-mod-easy
- selection-mod-nofail
- selection-mod-halftime
- selection-mod-hardrock
- selection-mod-suddendeath
- selection-mod-perfect - Icon for perfect mod. Just click hold on sudden death icon and drag it away to change.
- selection-mod-doubletime
- selection-mod-nightcore - Same as perfect mode. Click hold and drag away double time mod icon.
- selection-mod-hidden
- selection-mod-fadein - osu!mania mod, just press on hidden while in osu!mania game mode.
- selection-mod-flashlight
- selection-mod-relax
- selection-mod-relax2 - Autopilot icon
- selection-mod-spunout
- selection-mod-auto - icon for Autoplay mod
- selection-mod-key4/5/6/7/8 - osu!mania mods
It might be a little hard to work on such a small area, using "unsharp mask" filter can make your icons more readable. You can change their size, but remember that too big icons might overlap with each other.
Default icon set :
Examples :
Slider and everything related to itLet's begin with list of parts that are related to slider :Default slider :
- Sliderball - While making it, avoid making it larger than slider, it may look a little bad. Sliderball can be animated but naming is a little different that other animations - sliderball0, sliderball1, sliderball2, sliderball3 etc.
- Sliderfollowcircle - When you are going to make it, try to keep it's size and shape, since it shows holding area of sliderball, changing it might confuse player. Can be animated.
- Reversearrow - Arrow that bounce our sliderball. If you are going to use something else than arrow, remember to make it visible as possible and not larger than hitcircle.
- Sliderscorepoint - A minor slider tick icon that appear on sliders. Make it visible.
- Sliderpoint10 - A number of points that appears when you catch slider tick with sliderball.
- Sliderpoint30 - A number of points that appears when you hit start of slider correctly and when sliderball hit reverse arrow.
- SliderStyle - Allows you to change inner part of slider. Check back skin.ini section for more info.
And examples of slider :
Spinner and everything related to itBecause spinner uses several parts, I will do another list...Default spinner:
- Spinner-approachcircle - Work in similar way as approach circle but this one can tell you how long is spinner.
- Spinner-background - Body of spinner, actually spinner is not supported by widescreen so you can only make it max 1024x768. Remember to include something that will allow player to find centre of spinner, you can add this here or on spinner-circle. Default spinner background is 1023x692, but you can change it to full screen version (1024x768).
- Spinner-circle - Another main part of spinner. Please be careful while making it, because you can make it wobbly which is a bad thing.
- Spinner-clear - Text that appears whenever you have spined long/fast enough to pass spinner.
- Spinner-metre - Progress bar of every spinner. You need raise it to certain point to pass spinner. Same as background, size is 1023x692 but you can change it.
- Spinner-osu - Appears after clearing spinner.
- Spinner-rpm - Area with "Spin per Minute" text on it
- Spinerr-spin - Text that simply tells you to spin through spinner.
- Various options in skin.ini - Just look into skin.ini section.
Examples of spinner:
 Other partsFew other parts :
- Follow-point - Special element that direct you to another hitircle/slider of the same combo chain. Appears only at longer distance between notes. It's good to make it a little larger and colourful to make it visible.

- Menu-background.jpg - Background for main manu. This part is only loaded/available for osu! supporters. You will also see it in options, multiplayer lobby, multiplayer match background and osu!direct background. This is the only skin element that must be in .jpg extension. You can easily change it by just dragging a picture and dropping it in main menu window, it will create/replace menu-bacground in you current skin. If you have created picture of size 1366x768, it will be cut from left side at lower width resolutions.
Example :
- Play-unranked - Skin element of "Unranked" text that appears when using auto/relax/autopilot mods.


- Selection-tab - Skin elements for most of tabs that you can find in game.
- Small-letters - Small letters know as : ranking-D-small, ranking-C-small etc. You can find these in 3 places. In beatmaps ranking, song select panel and near score while having a section break in beatmap. Typically these are the same as ranking-letters.
- Star - Difficult "stars" that you can see in song menu. These are sliced by half when difficulty is 4,5 or something, you can use this to create "10 stared difficulty", see this in example below.
- Star2 - "Stars" that are dropped from cursor in breaks, kiai time, while playing with relax or autopilot mod. Also used by kiai fountain and appears together with comboburst.


5. Catch the Beat Elements
To be added...6. Taiko Elements
I will explain here with one element and where it's applied in gameplay.Taiko
- Taiko character aka "pippidon" - It can be easily animated in similar way as sliderball. All character "actions" explained below.
- pippidonidle0, pippidonidle1, pippidonidle2 etc. - character in idle mode, simply waiting.
- pippidonkiai0, pippidonkiai1, pippidonkiai2 etc. - character animation in kiai time.
- pippidonfail0, pippidonfail1, pippidonfail2 etc. - character animation when player started failing.
- pippidonclear0, pippidonclear1, pippidonclear2 etc. - character animation while player pass past combo milestone (50, 100, 200, etc.) and after correctly cleared spinner.- Spinner-warning - Warning about spinner that appears on taiko bar.
- Taiko-bar-left - Left part of taiko bar. Place where you see your "buttons".
- Taiko-bar-right and Taiko-bar-right-glow - Right part of taiko bar. "Glow" bar appear in kiai time.
Taiko-bar-right :
Taiko-bar-right-glow :- Taikohitcircle and Taikohitcircleoverlay - It's almost same thing like hitcircle and hitcircle-overlay with one difference, Taikohitcircleoverlay can be animated.
- Taikobigcircle and Taikobigcircleoverlay - Same as above but it's applied to the big circles.
- Taiko-drum-inner and Taiko-drum-outer - Red and Blue button indicators on left taiko bar.
- Taiko-flower-group - Appears behind Taiko mascot after hitting combo milestone.
- Taiko-hit300, Taiko-hit100 etc. - Same thing as standard hitbursts 300,100,50 etc.
- Taiko-glow - Appears behind "hitting" area in kiai time.
- Taiko-roll-end and Taiko-roll-middle - It's taiko slider. Please note that taiko-roll-middle is "copied" to fit length of slider. (That's why it's only 1px width).
- Taiko-slider and Taiko-slider-fail - These are upper part of taiko bar. They aren't restricted by length, so with right idea you can make something nice.
Taiko-slider :
Taiko-slider-fail :7. osu!mania elements (In progress, please wait)
Let me explain skin parts and osu!mania [X]k.ini files.osu!maniaLet’s start with skin parts.[/list]
- LightingN – Lighting that appear when you hit a note on judgment bar (named that correctly?). Can be animated, through it’s pretty fast animation.
- LightingL - Same as above but it’s for “slider” notes.
- mania-hit0, 50, 100, 200, 300, 300g – Hitbursts for osu!mania. You can animate them, but remember these are really fast, so you need to be cleaver to make them visible. Animation isn’t looped, that means it is long as many sprites you did.
- mania-key1 /2/S – Skin for buttons. Be careful with using patterns on it. Because later in .ini files you might set length of buttons that can make patterns stretched. Special button is used in 7k/8k game mod.
- mania-key1D/2D/SD – Skin for buttons while pressed. Same as above.
- mania-note1/2/S – Skin for mania notes.
- mania-note1H/2H/SH – Skin for end parts of “slider”.
- mania-note1L/2L/SL – Skin for middle part of “slider”. This one can be animated.
- mania-stage-hint – know as judgment bar. Place where you need to hit note correctly. If you have problems with correct position of it use judgment line that you can set in .ini files.
- mania-stage-left/right – A left/right part of mania playfield. They aren’t restricted by size, so you can make neat sides by adding something more than border. If you will use it just for border, do a smaller part - rest will be repeated from upper part of screen to bottom.
But if you are going to something larger, set height at 768px and width of your preference.- mania-stage-light – special light that appears on column stage when you hit a button. Game will always try to fit it into column width, making them wide will force game to resize it to size of column.
Better make higher than wider.- selection-mod-key4/5/6/7/8 – mod icons for mania key mods.
- special-mania - osu!mania icon is special mode select.
8. Sounds :
To be added...9. Creating .osk files
All that the user will need to do is open the file with osu!.
You need to create .osk (osu! skin) file. You can create one from the skin selection screen, or manually with the steps below.
Creating .osk file with WinRAR
Creating .osk file with 7-ZIP
In short : You need to create .zip archive and simply change extension to .osk10. Uploading screenshots / creating video preview of your skin :
To be added...11. Uploading your skin and creating thread for it :
First delete all not skinned parts, we don't need them. Next you need to create archive (zip, rar, 7z or .osk file with is recommended) and upload it somewhere. Mostly people prefer direct download. You can use upppy! or puush. Mediafire is fine too. (Of course you can use other sites for upload).
If you don't know how to make friendly looking thread use this template.Template by DragvonDon't forget about screenshots. (people wants to see your skin before downloading).[General]
Skin Name: Your skin name will go here.
Creator: Name(s) of who made it.
Theme: Tell us what theme your skin is based at.
Version: Self-explanatory
Tags: This can make finding your skin easier.
Download: Put download link here.
[Data]
Size: Aprox. size of you skin
Is it fully skinned? Yes/No. (Gameplay/Menu/Taiko/Catch the Beat - only?)
Screenshots: Screenshots go here. (Adding a spoilerbox is usefull for people with slow connections)
Video preview : (If you have one)
[Misc]
Creator's comment: Self-explanatory.
Updates: Leave your updates here (Again, a spoilerbox could be very usefull here)
Requests: Since no one is perfect, you can use this to request help to your skin
You can use upppy to upload them.
______________________________________________________________________________________________________
Of course the information listed here only shows how things work and what is important. The rest depends on your photoediting skills.
And geez... don’t be shy if you don’t know how to make something. Feel free to ask me or other people who can help you.
Did you check out the skin.ini? there should be a rule that allows you to change the rgb of the sliders. lower them4ert wrote:
Hi, i have a problem with my skin. Sliders arent as bright as circles.
SliderTrackOverride: (red),(green),(blue)As for the circles, find
[Colours]etc.
Combo1: (red),(green),(blue)
Combo2: (red),(green),(blue)
Combo3: (red),(green),(blue)
tyThe DR wrote:
Did you check out the skin.ini? there should be a rule that allows you to change the rgb of the sliders. lower them4ert wrote:
Hi, i have a problem with my skin. Sliders arent as bright as circles.SliderTrackOverride: (red),(green),(blue)As for the circles, find[Colours]etc.
Combo1: (red),(green),(blue)
Combo2: (red),(green),(blue)
Combo3: (red),(green),(blue)
and make the values higher P;
ThanksMLGnom wrote:
In progress, please wait patiently. (I'm busy with work lately, so it might take some time)
Parts within [x] are done.
But still if you have any questions, go ahead and ask, I will answer them for sure.[1.] Introduction : “I want to make a skin!“
Well nice decision, but remember skinning can be little hard for a newbie. In the beginning of making any skin, you should have :
- Beginner skills with any program that supports transparency (Photoshop, GIMP, Paint.NET, others)
- Patience (skinning can take a little time)
- An idea! Yes, this is important thing. Try be clever while making your skin.
- And of course you need something with you can start work… Here, a skin templates (New skin template is a little incomplete and mixed with old one to fill all missing files, but should be enough to make new style skin).
or
[2.] Skinning Basics :
BasicsWhat is skinning? I need some magical powers to do a skin?
Skinning is a simple picture changing mechanism that osu will load upon selecting certain skin.
Creating skins is easy (creating elements is a little more difficult thing to achieve). First you need to find your “Skins” folder that must be inside your osu! directory. To start creating new skin, install template (download it and just open, osu! will do the rest) rename template folder to your skin name and start editing it. (or copy template skin if you will need it for something).
Actually we have skinning elements for all four game modes :Together there will more than 200 elements to edit (without animations).
- osu! standard,
- Catch the beat,
- Taiko,
- osu!mania
But don’t be scared with the amount of files. You are not forced to change everything.What skin should contain?
Generally - skin elements and skin.ini with is important part of your skin. What is skin.ini I will explain later in “skin.ini” part. Which parts you are going to add it’s completely up to you. Every part that you won’t change, will be taken from default skin.
You are free to add different folders with alternative parts into your skin, osu! won’t care if they are there or not.What is new and old style skinning :
Old style skinning is a style that was used by old default skin (before March 2013).
With “March 2013 update” peppy introduced new default skin and it’s new behaviours and parts.
There were few important changes like new spinner, countdown, hitbursts, ranking-panel behaviour. More about these parts you can read about later.
To active new skin behaviour select this in skin options :
or add to skin.ini "Version:1" to force old behaviour, "Version:2' to force new behaviour.Using elements from other skins :
This is important rule of skinning. Never use other users elements without permission. If you got permission or user is no longer active and it’s impossible to contact with them remember to credit them properly. (Something like : Elements xxx from <name of user>’s <skin/beatmap link/name>). Especially DON’T USE parts that come from skin mixes and “creator” of mix doesn’t know where he get these elements. If you can’t find original creator of skin part (asked some people already, searched in skinning subforum), you shouldn't use it, but as long as there will be note that you are still looking for author of xxx.png, it’s fine.
If you are going to make “skin mix” keep it for yourself or post it on your profile page. We don’t need them in skinning subforum.Parts that can be animated
osu! allows to create animations for some elements. To create animation all you will need to do is creating frame by frame and naming them by <name of part>-0.png, <name of part>-1.png, <name of part>-2.png etc. You are not limited to amount of frames. Exception is only sliderb with is named sliderb0, sliderb1, sliderb2 etc.List of files that can be animated :
If your animation is too fast, you can fix that in 2 ways. First, try to make them longer by doubling frames. For example frame 0 and 1 are the same picture (so picture will last 2 frames), frame 2 and 3 are second picture, etc. This will make animation slightly slower. But it won’t work on menu-back and hitbursts. In that case you need to use “AnimationFramerate” option. Read more about it in skin.ini part.
- followpoint
- fruit-ryuuta
- menu-back
- play-skip
- scorebar-colour
- sliderfollowcircle
- taiko mascot
- taikocircleoverlay
- taikobigcircleoverlay
- hitbursts (300, 100, 50, miss)
- hitcircleoverlay
- sliderb
- Probably few more, will add them when found.
Important information about game mode skins :
osu! standard
Normal - Kind of skin, that skinner creates as he/she wish. Follow or don't follow template sizes. These are often colourful and creative. May contains many different animations. Typical skin for casual player.
Simplified - This kind of skin is directed to a players who dislike distractions, but like to see some things. Skins like this often have minimized size of hitbursts (300,100, 50 etc.), size of parts aren't larger than template's, less colourful, less animations.
"PRO" skins - This kind of skin it totally focused on removing any distractions that skin can provide. Skins like this contains transparent hitbursts, no animations, reduced amount of colours used in it, larger "followpoint.png", semi-transparent hitcircle.Catch the beat
For CtB skins is important to keep droplets large (but not huge) and visible. These are small and is easy to miss.
For catcher you must be careful with plate size. If you make it too short, player won’t be able to play correctly with it since “catching” area is wider. In other hand making it too wide will mislead player and will often miss since catching area is shorter than plate.Taiko
VERY IMPORTANT in taiko skinning is that you must make Don (red notes) and Katsu (Blue notes) visible as possible. Taiko is dynamic game mode and you don’t have time to think if it’s a Don or Katsu.osu!mania
Still gathering data. Sorry!
If someone can provide some info about important things while making osu!mania skins, go ahead and post them here.R-15 and R-18 content in skins :
Probably some of youpervertswould like to make a skin that will contain mature content.
Case is simple, if you are going to post a skin that have it, you are only allowed to post R-15 "ecchi" (suggestive, visible underwear, swimsuits/bikini etc.and you need to avoid adding characters with really skimpy clothing) . Also you must add warning that your skin have these.
You are NOT allowed to post skins that contains any R-18 (nudity,pornography etc.) in skinning subforum. If you post somewhere else in osu! community be aware that you might be punished for that. (But if you release it outside osu! community nobody will hunt you).[3]. What is a skin.ini?
Skin.ini is a necessary file of any skin. It contains several major options of the skin, creator name and name of a skin that show up in osu! Let me explain every line of the skin.ini.Skin.ini[General]
- Name - just put the name and version of your skin here .
- Author – if it’s your skin your name should be here.
- Version: 1/2 Forces osu! to use old/new style behaviour.
- SliderBallFlip – 0/1 this changes the sliderball movement when it meets a reverse arrow. If you switch it off the sliderball will just move backwards after reverse arrow. Explained below.
- Sliderb with turned off flip [0]
- Sliderb with turned on flip [1]
- CursorRotate – 0/1 controls whether the cursor rotates or not.
- CursorTrailRotate: 0/1 – controls whether the cursor trail rotates with cursor or not.
- CursorExpand – 0/1 when turned on, the cursor expands when clicking.
- CursorCentre – 0/1 while turned off the action point of the cursor will be in the top left corner of the image, rather than the center.
- SliderBallFrames – amount of sliderball frames(pictures) used in the skin.
- HitCircleOverlayAboveNumer – 0/1 if turned on, makes numbers appear under the “hitcircleoverlay”
- ComboBurstRandom : 0/1 – makes combobursts appear in a random sequence.
- AnimationFramerate: "Number of frames" – Defaults to playing all available frames per second. Applies to all animated sprites except slider ball, hitbursts. The lower amount of them, the slower animation will be.
- CustomComboBurstSounds: 50,100,200,300,400,500 etc. – Originally this option was intended for Taiko, since you can't change combobursts combo. Combo sound will be played at specified combo number. For example, we set CustomComboBurstSounds: 20,60,150,432, 864,1000 - combo sound/sounds will be played at combo : 20,60,150,432,864,1000.
- SpinnerFadePlayfield: 0/1 – If this is set to 0, background of spinners will be transparent (you will be able to see map playfield/video). Example how it's work. SpinnerFadePlayfield: 1 and SpinnerFadePlayfield: 0
- SpinnerNoBlink: 0/1 – When set to 1, it will stop spinners from "blinking" at top of the metre as they rise/peak.
- SliderStyle : 1/2/3 - Changes the slider style.
Slider style :1
Slider style: 2
Slider style: 3 (Right now this one is disabled)[Colours]
Every colour is defined as a R,G,B palette.
- Combo colours – allows you to use skin hitcircle colours if the beatmap used default. You can use up to 8 colours.
- SliderBorder – changes colours of the slider border
- SliderTrackOverride – Forces osu! to use certain colour for slider. For example :
SliderTrackOverride: 150,25,25- MenuGlow: 0,0,0 - changes the colour of glow around osu! logo in main menu. This is supporter only feature.
- SpinnerApproachCircle – Changes the colour of SpinnerApproachCircle.
- SpinnerBackground: 255,255,255 - You can use this option to change colour/dim of spinner background while using old style behaviour. Read more in this post.
- SongSelectActiveText: 0,0,0 – Changes text colour on actually selected difficult.
SongSelectActiveText: 247,135,27- SongSelectInactiveText: 0,0,0 Changes text colour on actually selected song (but not selected difficult).
SongSelectInactiveText: 0,0,0- StarBreakAdditive: – Changes the colour of star2.png (dropped by cursor) during breaks and kiai time. Hard to explain this correctly, read more about this in ziin's post.
Normal star2.png :
Changed colour with skin.ini (StarBreakAdditive: 0,255,0) :[Fonts]
This allows you to manipulate the number images. About that “overlap”, the higher it is - the closer the numbers are.
Default numbers are used on hitcircles.
Score numbers are used for score and ranking.
Also swapping prefixes can influence the custom skins in beatmaps.
- “HitCirclePrefix : default” – changing this to “score” allows you to use one kind of number.
- “HitCircleOverlap: 3”
- “ScorePrefix: score” - changing this to “default” allows you to use one kind of number.
- “ScoreOverlap: 3”4. Standard skin elements.
The main point of skinning. It’s good to keep the image sizes the same as on the originals, but this is not a rule. I will present and explain every part of standard skin elements.ApproachcircleApproach circle is important part of gameplay. It is a circle that tells you when you need to hit a circle. Approach circle uses same colours as hitcircle so try to make it grey-scaled or preferably, white. While using "Hidden" mod approach circle is... well... hidden.
It's recommended to keep shape of circle or something similar to it, since player may get confused.
Few examples :Button-left, Button-middle, Button-rightThis is skin part for buttons that you can find in several places in osu!, like mods selection menu, beatmap options, multiplayer/match buttons etc.
As you can see, every button is made of 3 parts. Left, middle and right. You need to be careful to made them at same height. To have correctly aligned parts remember that button-left must be connected to the right side of picture workspace and button-right to the left.
While adding any pattern/objects to it, remember that in some places button is resized... it can look a little ugly.ComboburstsCombobursts are characters that appears at specific combo from left or right side of screen. Recommended size is 768x500px but you can do it wider. Remember to make the comboburst characters (or whatever it is) appearing from left side while in the folder. Also adding any text to combobursts does not work well as osu! mirrors the images when they appear from the right side. To add several combobursts follow this naming rule : comboburst-0, combourst-1, combobursts-2, etc.
I have noticed one thing, many people simply don't know how to correctly crop a character out of picture and they are just using magic wand tool and delete selected area... please don't do that! It often leave many white parts or even removes something from your character... If you don't know how to cut your character out of picture, please check these 2 small tutorials:
Cropping tutorial for "Complicated Backgrounds" and Cropping tutorial for "Simple Backgrounds"
Few examples of combobursts :CountdownCountdown is a part of some maps. It's give warning to prepare for playing map.
After last wide-screen update creating countdown should be a lot easier.
You are not restricted by width of count pictures but height should always be 768px.
How positioning of counts works :
Count 3 - Anchor position of it's at left side. Left side of picture will start here.
Count 2 - Anchor position of it's at right side. Right side of picture will start here.
Count 1 - Anchor position is at centre of screen. Centre of your picture will be here.
So, with this you are able to create many different countdowns. But you need to remember about how they are layered. Count 3 is always on top, count 2 is behind and count 1 is covered by them. So it's kinda impossible to make stacked countdown (you know numbers that appears on previous one).
Examples : (to be added)
To countdown we can also add go.png and ready.png . Not much to say about these.
You are not restricted by size so you can try to make something different than default "Go" and "Are you ready?".
Example of different go.png :Cursor and Cursor trailCursor is most important part of standard mode skinning.
Every player have their own opinion about cursors and what kind is the best.
While making one you should do it in kinda different colour than skin uses, to make it visible as possible. Cursor-trail can help increase visibility of cursor
By turning off skin.ini option "Cursor Centre" you gain possibility to make cursors that acts as your Windows cursor.
Examples of cursor : (more to be added)Default numbers and Score numbersDefault numbers - These numbers are used on hitcircles, as counter for actual circle combo. Kinda misleading naming, don't you think? Be aware of using something else than arabic numbers. Might be a little complicated with combo 10 and up (Roman numbers for example, it's impossible to make 10 as X, 11 as XI etc.).
Score numbers - Numbers used for score and your actual combo. You should try to make these large as template numbers. Too small may by hard to see, too large will be distracting and may look ugly. Remember that score numbers are also on ranking screen, making them large will complicate creating ranking panel.
When you are using widescreen resolution, don't forget about people that plays on 4:3 aspect ratio. You can easily make numbers a little larger and lifebar will start to cover them.
You can fix that by editing Score Prefix in skin.ini
Examples of numbers :HitburstsHitbursts are "explosions" that appears in front of correctly clicked circle, slider, spinner. In other words - 300,100,50 and miss.
This is very important part of standard mode skin. It can really affect how can you play (or think you are playing ^^;). NEVER do them larger than template hitbursts (I haven't meet a person that would like them being huge).
Let's begin with small gameplay explanation how you are getting 300k or 300g.
300.png - you are getting this one for correct hit at note/full slider or finished spinner.
300k.png/100k.png - "Katu" is for correct hit at last note of combo chain but you have got somewhere 100 (green katu is for hitting last note incorrectly).
300g.png - "Geki" is for correctly finished combo chain (you have gained 300 for every note in combo chain)
As you know from "Basics" section, people have different preferences. Making small or blank hitbursts it's kinda easy but making something creative but still not that distractive might be a little harder. I will show few examples :
Hitbursts can be animated, simply like other animations - hit300-0.png, hit300-1.png,hit300-2 etc. but remember that animation will be fast and is not affected by "Animation Framerate" from skin.ini.Hitcircle and HitcircleoverlayHitcircle and Hitcircleoverlay are another key parts of standard skinning. Together with default-numbers creates standard hit note :
While making hitcircle remember about combo colours. Avoid using too much black colour since can make it unreadable.
Some people likes when hitcircle it's semi-transaprent, it helps them read streams etc.
Hitcricleoveraly - use it to make your hitcircle readable! It isn't affected by combo colours so you can make them in whatever way/colour you want.
Remember to make it slightly larger than hitcircle.
Few examples of hit notes :HitcircleselectHitcircleselect is a sprite for "selected object" in beatmap editor.
It's a blue glow on the picture.LightingLighting is part of hitcircle. It appears behind hitcircle after hitting it. You can also see it behind circle when beatmap have kiai time.
Please, try to avoid making it very large, since it's expanded after appearing. If you want it to be visible behind hitcircle in kiai time, simply make it a little larger than hitcircle.
In default skin it's just a glow :
Lighting is also visible in kiai time while playing CtB
Examples of lighting :Menu-backButton that appears in any menu (options, osu!direct, special mode select, song select). This is one of few parts that have size restricted. If you make it any larger than template, part of it will be outside screen. You can also animate it.
Examples :Menu-button-backgroundThis part appears in few places, but main usage is in song selection screen as background for beatmaps info.
While making menu-button-background you must remember about few things.And few exmaples :
- Don't make it too large because it will look ugly when things start to overlap.
- It's coloured differently, try making it grayscaled or just avoid using too much of dark colours.
- You can try to be clever while making "bars" for songs names.
- You can change colour of text used, look into skin.ini part for SongSelectInactiveText and SongSelecActiveText:
Pause/Fail screenSkinning pause or fail screens it easy. Only few elements are used and it's widescreen compatible.
So, let's begin with background. For pause background you need to skin pause-overlay, for fail - fail-background. If it's a personal skin, use your osu! resolution as size (as long as it uses more than 768px height). If you are going to make public skin, you can do 2 versions of it - one in 1366x768 size, second in 1024x768 but using 1366x768 is the safest option since on lower width resolutions, sides of picture are cut (while 1024x768 have black bars at sides). Default skin doesn't have pause/fail backgrounds.
Another parts are pause-continue, pause-retry, pause-back (fail screen only have retry and back). These aren't restricted by size and clickable area is resolution of picture.
Examples of pause :
Examples of fail :PlayfieldPlayfield as the name says it's a background of our playfield. Actually it appears really rarely, only on old maps that doesn't have their backgrounds. But it also serve a purpose of ranking-panel background. But I will tell more about this in ranking-panel section.
Playfield is widescreen compatible, you can use any aspect ratio since osu! resizes 4:3 pictures to fit screen on widescreen, and while using widescreen bg on 4:3 it's adding black bars from upper and bottom panels.
Default playfield :Play-skipSimilar part to menu-back with one exception, is not restricted by size. Used to skip beginning of some beatmaps. This part can be animated.
Default :
Examples :Play-warningarrowWarring arrow that appears at the end of section break (pass or fail), in pause menu - pointing at actually selected button (appears after pressing keyboard arrows) and while playing TAG in multiplayer - warns about your turn. Remember that warning arrow appears from both sides, right side is mirrored.
Default :
Examples :Ranking-panelRanking panel uses many skin which you can create pretty nice thing.
Default ranking panel :
So, let's begin.Examples of ranking :
- Ranking Letters - It's not hard to do them. Just don't make them freaking huge. Remember ranking-X is for SS, ranking-SH - Platinium S, ranking- XH - Platinium SS.
- Ranking-accuracy and maxcombo - As the name says. Personally I recommend to make them blank and add "Max Combo" and "Accuracy" by yourself on raking-panel. It's just easier to position them.
- Ranking buttons (retry,back,replay) - Similar part to pause buttons.
- Ranking-graph - This one is kinda size and position restricted. Easiest way to make it, is by using default one, since you won't have problems with correct position to fit actually showed graph.
- Ranking-perfect - You can make it in whatever way you want, add text or picture. Be aware that sometimes you will need to do minor positioning.
- Ranking-title - Title of Rankings. Usually used as "RANK / Your Rank".
- Ranking-winner - A small box that shows winner of multiplayer match.
- Ranking-panel - the heart (:3) of ranking. It's not restricted by size (but is restricted by position), so fell free to experiment. Like I said in "score numbers" part, you must remember that is hard to fit large numbers into ranking spaces. I recommend to test your ranking on long maps that have high combo (for example paraparaMAX I, just check out someone's score).
- Background of ranking - After widescreen update, creating ranking panel of 1024x768 size to cover whole screen doesn't work well. Instead now the main role of background takes playfield.png
Scorebar (lifebar)This is troubling for most of the skinners if they want to make lifebar different than the original. That's because scorebar-colour has different anchor position than scorebar-background.
Blue lines show the anchor position for scorebar-colour and if you want to fit them in the same place, try moving the scorebar-background. Also you don’t need to keep length of the lifebar, you can make it shorter or longer (for widescreen). Scorebar-colour can be animated.
Default lifebar :
Interesting thing about scorebar-background is lack of size restriction with you can use to make some kind of border for combo or score. I will provide example, so this should be easier to understand :
This is more like option for personal use, since you need to make it in your aspect ratio size. For this example was 1311x768, for 16:9 will be 1366x768 etc.
Some people might like this option since someone would like to cover score or something. Be aware that scorebar-background is a highest layer of gameplay which means it will cover any other aspect of screen.
Scorebar-ki/kidanger/kidanger2 - part of lifebar that's goes with your actual life. Ki is from 50-100% of life, kidanger appears at 25-50% life, kidanger2 appears when player have less than 25% of life.
Examples of lifebar :
Section Pass and Section FailPictures that appears in longer breaks. You can gain section pass for having more than 50% of life before break. Section Fail appears while having less than 50% of life. Nothing special about these, they don't have size restrictions so fell free to make them larger.
Default :
And of course examples :
Pass:
Fail:Mod iconsAs name says, icons for addition mods that make game easier/harder etc.
List of actual mods :You can also find 2 other icons in older skins that aren't used any more : selection-mod-novideo and selection-mod-taiko.
- selection-mod-easy
- selection-mod-nofail
- selection-mod-halftime
- selection-mod-hardrock
- selection-mod-suddendeath
- selection-mod-perfect - Icon for perfect mod. Just click hold on sudden death icon and drag it away to change.
- selection-mod-doubletime
- selection-mod-nightcore - Same as perfect mode. Click hold and drag away double time mod icon.
- selection-mod-hidden
- selection-mod-fadein - osu!mania mod, just press on hidden while in osu!mania game mode.
- selection-mod-flashlight
- selection-mod-relax
- selection-mod-relax2 - Autopilot icon
- selection-mod-spunout
- selection-mod-auto - icon for Autoplay mod
- selection-mod-key4/5/6/7/8 - osu!mania mods
It might be a little hard to work on such a small area, using "unsharp mask" filter can make your icons more readable. You can change their size, but remember that too big icons might overlap with each other.
Default icon set :
Examples :
Slider and everything related to itLet's begin with list of parts that are related to slider :Default slider :
- Sliderball - While making it, avoid making it larger than slider, it may look a little bad. Sliderball can be animated but naming is a little different that other animations - sliderball0, sliderball1, sliderball2, sliderball3 etc.
- Sliderfollowcircle - When you are going to make it, try to keep it's size and shape, since it shows holding area of sliderball, changing it might confuse player. Can be animated.
- Reversearrow - Arrow that bounce our sliderball. If you are going to use something else than arrow, remember to make it visible as possible and not larger than hitcircle.
- Sliderscorepoint - A minor slider tick icon that appear on sliders. Make it visible.
- Sliderpoint10 - A number of points that appears when you catch slider tick with sliderball.
- Sliderpoint30 - A number of points that appears when you hit start of slider correctly and when sliderball hit reverse arrow.
- SliderStyle - Allows you to change inner part of slider. Check back skin.ini section for more info.
And examples of slider :
Spinner and everything related to itBecause spinner uses several parts, I will do another list...Default spinner:
- Spinner-approachcircle - Work in similar way as approach circle but this one can tell you how long is spinner.
- Spinner-background - Body of spinner, actually spinner is not supported by widescreen so you can only make it max 1024x768. Remember to include something that will allow player to find centre of spinner, you can add this here or on spinner-circle. Default spinner background is 1023x692, but you can change it to full screen version (1024x768).
- Spinner-circle - Another main part of spinner. Please be careful while making it, because you can make it wobbly which is a bad thing.
- Spinner-clear - Text that appears whenever you have spined long/fast enough to pass spinner.
- Spinner-metre - Progress bar of every spinner. You need raise it to certain point to pass spinner. Same as background, size is 1023x692 but you can change it.
- Spinner-osu - Appears after clearing spinner.
- Spinner-rpm - Area with "Spin per Minute" text on it
- Spinerr-spin - Text that simply tells you to spin through spinner.
- Various options in skin.ini - Just look into skin.ini section.
Examples of spinner:Other partsFew other parts :
- Follow-point - Special element that direct you to another hitircle/slider of the same combo chain. Appears only at longer distance between notes. It's good to make it a little larger and colourful to make it visible.
- Menu-background.jpg - Background for main manu. This part is only loaded/available for osu! supporters. You will also see it in options, multiplayer lobby, multiplayer match background and osu!direct background. This is the only skin element that must be in .jpg extension. You can easily change it by just dragging a picture and dropping it in main menu window, it will create/replace menu-bacground in you current skin. If you have created picture of size 1366x768, it will be cut from left side at lower width resolutions.
Example :
- Play-unranked - Skin element of "Unranked" text that appears when using auto/relax/autopilot mods.
- Selection-tab - Skin elements for most of tabs that you can find in game.
- Small-letters - Small letters know as : ranking-D-small, ranking-C-small etc. You can find these in 3 places. In beatmaps ranking, song select panel and near score while having a section break in beatmap. Typically these are the same as ranking-letters.
- Star - Difficult "stars" that you can see in song menu. These are sliced by half when difficulty is 4,5 or something, you can use this to create "10 stared difficulty", see this in example below.
- Star2 - "Stars" that are dropped from cursor in breaks, kiai time, while playing with relax or autopilot mod. Also used by kiai fountain and appears together with comboburst.
5. Catch the Beat Elements
To be added...6. Taiko Elements
I will explain here with one element and where it's applied in gameplay.Taiko
- Taiko character aka "pippidon" - It can be easily animated in similar way as sliderball. All character "actions" explained below.
- pippidonidle0, pippidonidle1, pippidonidle2 etc. - character in idle mode, simply waiting.
- pippidonkiai0, pippidonkiai1, pippidonkiai2 etc. - character animation in kiai time.
- pippidonfail0, pippidonfail1, pippidonfail2 etc. - character animation when player started failing.
- pippidonclear0, pippidonclear1, pippidonclear2 etc. - character animation while player pass past combo milestone (50, 100, 200, etc.) and after correctly cleared spinner.- Spinner-warning - Warning about spinner that appears on taiko bar.
- Taiko-bar-left - Left part of taiko bar. Place where you see your "buttons".
- Taiko-bar-right and Taiko-bar-right-glow - Right part of taiko bar. "Glow" bar appear in kiai time.
Taiko-bar-right :
Taiko-bar-right-glow :- Taikohitcircle and Taikohitcircleoverlay - It's almost same thing like hitcircle and hitcircle-overlay with one difference, Taikohitcircleoverlay can be animated.
- Taikobigcircle and Taikobigcircleoverlay - Same as above but it's applied to the big circles.
- Taiko-drum-inner and Taiko-drum-outer - Red and Blue button indicators on left taiko bar.
- Taiko-flower-group - Appears behind Taiko mascot after hitting combo milestone.
- Taiko-hit300, Taiko-hit100 etc. - Same thing as standard hitbursts 300,100,50 etc.
- Taiko-glow - Appears behind "hitting" area in kiai time.
- Taiko-roll-end and Taiko-roll-middle - It's taiko slider. Please note that taiko-roll-middle is "copied" to fit length of slider. (That's why it's only 1px width).
- Taiko-slider and Taiko-slider-fail - These are upper part of taiko bar. They aren't restricted by length, so with right idea you can make something nice.
Taiko-slider :
Taiko-slider-fail :7. osu!mania elements (In progress, please wait)
Let me explain skin parts and osu!mania [X]k.ini files.osu!maniaLet’s start with skin parts.[/list]
- LightingN – Lighting that appear when you hit a note on judgment bar (named that correctly?). Can be animated, through it’s pretty fast animation.
- LightingL - Same as above but it’s for “slider” notes.
- mania-hit0, 50, 100, 200, 300, 300g – Hitbursts for osu!mania. You can animate them, but remember these are really fast, so you need to be cleaver to make them visible. Animation isn’t looped, that means it is long as many sprites you did.
- mania-key1 /2/S – Skin for buttons. Be careful with using patterns on it. Because later in .ini files you might set length of buttons that can make patterns stretched. Special button is used in 7k/8k game mod.
- mania-key1D/2D/SD – Skin for buttons while pressed. Same as above.
- mania-note1/2/S – Skin for mania notes.
- mania-note1H/2H/SH – Skin for end parts of “slider”.
- mania-note1L/2L/SL – Skin for middle part of “slider”. This one can be animated.
- mania-stage-hint – know as judgment bar. Place where you need to hit note correctly. If you have problems with correct position of it use judgment line that you can set in .ini files.
- mania-stage-left/right – A left/right part of mania playfield. They aren’t restricted by size, so you can make neat sides by adding something more than border. If you will use it just for border, do a smaller part - rest will be repeated from upper part of screen to bottom.
But if you are going to something larger, set height at 768px and width of your preference.- mania-stage-light – special light that appears on column stage when you hit a button. Game will always try to fit it into column width, making them wide will force game to resize it to size of column.
Better make higher than wider.- selection-mod-key4/5/6/7/8 – mod icons for mania key mods.
- special-mania - osu!mania icon is special mode select.
8. Sounds :
To be added...9. Creating .osk files
All that the user will need to do is open the file with osu!.
You need to create .osk (osu! skin) file. You can create one from the skin selection screen, or manually with the steps below.
Creating .osk file with WinRAR
Creating .osk file with 7-ZIP
In short : You need to create .zip archive and simply change extension to .osk10. Uploading screenshots / creating video preview of your skin :
To be added...11. Uploading your skin and creating thread for it :
First delete all not skinned parts, we don't need them. Next you need to create archive (zip, rar, 7z or .osk file with is recommended) and upload it somewhere. Mostly people prefer direct download. You can use upppy! or puush. Mediafire is fine too. (Of course you can use other sites for upload).
If you don't know how to make friendly looking thread use this template.Template by DragvonDon't forget about screenshots. (people wants to see your skin before downloading).[General]
Skin Name: Your skin name will go here.
Creator: Name(s) of who made it.
Theme: Tell us what theme your skin is based at.
Version: Self-explanatory
Tags: This can make finding your skin easier.
Download: Put download link here.
[Data]
Size: Aprox. size of you skin
Is it fully skinned? Yes/No. (Gameplay/Menu/Taiko/Catch the Beat - only?)
Screenshots: Screenshots go here. (Adding a spoilerbox is usefull for people with slow connections)
Video preview : (If you have one)
[Misc]
Creator's comment: Self-explanatory.
Updates: Leave your updates here (Again, a spoilerbox could be very usefull here)
Requests: Since no one is perfect, you can use this to request help to your skin
You can use upppy to upload them.
______________________________________________________________________________________________________
Of course the information listed here only shows how things work and what is important. The rest depends on your photoediting skills.
And geez... don’t be shy if you don’t know how to make something. Feel free to ask me or other people who can help you.
It worked! Thanks!Rio- wrote:
I have both Yugen and rustbell's skin. And I think It got something to do with the skin.ini
Try deleting the "AnimationFramerate" line from rustbell's skin.ini?
I guess its the ranking-SCORELETTER and not the ranking panelrepath wrote:
How do you make the ranking-panel.png change into different colors depending on what score you get on the map?
No, the ranking panel on the left changes colors based on what score letter you get:Domi200 wrote:
I guess its the ranking-SCORELETTER and not the ranking panelrepath wrote:
How do you make the ranking-panel.png change into different colors depending on what score you get on the map?
^^^^^^^^^TRUE^^^^^^^^^^Domi200 wrote:
I guess its the ranking-SCORELETTER and not the ranking panelrepath wrote:
How do you make the ranking-panel.png change into different colors depending on what score you get on the map?
use some good bulk image resizer or photoshop with autohotkeyEugene2017 wrote:
When renaming an HD resolution image with @2x in the name to replace the lower resolution, the image appears much larger in game...
is there a way scale the HD image down to fit the screen without losing image quality?
just play around with mania-stage-bottom a bit and you'll have what you wantNya Nya Neko wrote:
So I play alot of osu!mania, and i am pretty comfortable with playing hidden.
The "height" of the hidden mod depends on how high your combo is.
Thing is I would like to have the hidden at a high position at all times, and i was wondering if you could somehow skin a "fake hidden mod".
I tried it by changing the judgement-line and score-bar-color. both did not work out too well.
abusing the combo counter would work, i think, but it wouldn't look too great and would be more of a problem than a help while playing, is my guess.
any other ideas?
4/7/2016 3:41:51 PM: GL Initialized
4/7/2016 3:41:51 PM: GL Version:                 OpenGL ES 2.0 (ANGLE 2.1.0.0d79a9db3d42)
4/7/2016 3:41:51 PM: GL Renderer:                ANGLE (NVIDIA GeForce 940M                 Direct3D9Ex vs_3_0 ps_3_0)
4/7/2016 3:41:51 PM: GL Shader Language version: OpenGL ES GLSL ES 1.00 (ANGLE 2.1.0.0d79a9db3d42)
4/7/2016 3:41:51 PM: GL Vendor:                  Google Inc.
4/7/2016 3:41:51 PM: GL Extensions:              GL_OES_element_index_uint GL_OES_packed_depth_stencil GL_OES_get_program_binary GL_OES_rgb8_rgba8 GL_EXT_texture_format_BGRA8888 GL_EXT_read_format_bgra GL_OES_texture_half_float GL_OES_texture_half_float_linear GL_OES_texture_float GL_OES_texture_float_linear GL_EXT_texture_compression_dxt1 GL_ANGLE_texture_compression_dxt3 GL_ANGLE_texture_compression_dxt5 GL_ANGLE_depth_texture GL_EXT_texture_storage GL_OES_texture_npot GL_EXT_texture_filter_anisotropic GL_EXT_occlusion_query_boolean GL_NV_fence GL_EXT_robustness GL_EXT_blend_minmax GL_ANGLE_framebuffer_blit GL_ANGLE_framebuffer_multisample GL_ANGLE_instanced_arrays GL_ANGLE_pack_reverse_row_order GL_OES_standard_derivatives GL_EXT_shader_texture_lod GL_EXT_frag_depth GL_ANGLE_texture_usage GL_ANGLE_translated_shader_source GL_EXT_debug_marker GL_OES_EGL_image GL_EXT_unpack_subimage GL_NV_pack_subimage GL_OES_vertex_array_object
4/7/2016 3:41:51 PM: GL Context:                 Index: 205504804, Color: 32 (8888), Depth: 16, Stencil: 0, Samples: 0, Accum: 0 (0000), Buffers: 2, Stereo: False
4/7/2016 3:42:35 PM: Error in [Mania]        Line 59:  Expected type nullable`1 (name = NoteBodyStyle)
thanks alot <3Zero_078 wrote:
use some good bulk image resizer or photoshop with autohotkeyEugene2017 wrote:
When renaming an HD resolution image with @2x in the name to replace the lower resolution, the image appears much larger in game...
is there a way scale the HD image down to fit the screen without losing image quality?just play around with mania-stage-bottom a bit and you'll have what you wantNya Nya Neko wrote:
So I play alot of osu!mania, and i am pretty comfortable with playing hidden.
The "height" of the hidden mod depends on how high your combo is.
Thing is I would like to have the hidden at a high position at all times, and i was wondering if you could somehow skin a "fake hidden mod".
I tried it by changing the judgement-line and score-bar-color. both did not work out too well.
abusing the combo counter would work, i think, but it wouldn't look too great and would be more of a problem than a help while playing, is my guess.
any other ideas?
this works for me at 1080p: http://puu.sh/o9zsO/4ac484b6a5.png
if you don't play at HD resolution, remove the @2x and resize it to fit your need
---------------------------------
I have been using the fallback version for a while and decided to update to the stable version, but since then, mania long note body is repeating images instead of stretching like before (screenshot: http://puu.sh/o9zCD/941fb2c53b.jpg) Can someone help me solve this prob?
edit: I'm using skin version 2.5
edit: I thought changing NoteBodyStyle would solve the problem but when I changed it to Stretch, this appeared4/7/2016 3:41:51 PM: GL Initialized
4/7/2016 3:41:51 PM: GL Version: OpenGL ES 2.0 (ANGLE 2.1.0.0d79a9db3d42)
4/7/2016 3:41:51 PM: GL Renderer: ANGLE (NVIDIA GeForce 940M Direct3D9Ex vs_3_0 ps_3_0)
4/7/2016 3:41:51 PM: GL Shader Language version: OpenGL ES GLSL ES 1.00 (ANGLE 2.1.0.0d79a9db3d42)
4/7/2016 3:41:51 PM: GL Vendor: Google Inc.
4/7/2016 3:41:51 PM: GL Extensions: GL_OES_element_index_uint GL_OES_packed_depth_stencil GL_OES_get_program_binary GL_OES_rgb8_rgba8 GL_EXT_texture_format_BGRA8888 GL_EXT_read_format_bgra GL_OES_texture_half_float GL_OES_texture_half_float_linear GL_OES_texture_float GL_OES_texture_float_linear GL_EXT_texture_compression_dxt1 GL_ANGLE_texture_compression_dxt3 GL_ANGLE_texture_compression_dxt5 GL_ANGLE_depth_texture GL_EXT_texture_storage GL_OES_texture_npot GL_EXT_texture_filter_anisotropic GL_EXT_occlusion_query_boolean GL_NV_fence GL_EXT_robustness GL_EXT_blend_minmax GL_ANGLE_framebuffer_blit GL_ANGLE_framebuffer_multisample GL_ANGLE_instanced_arrays GL_ANGLE_pack_reverse_row_order GL_OES_standard_derivatives GL_EXT_shader_texture_lod GL_EXT_frag_depth GL_ANGLE_texture_usage GL_ANGLE_translated_shader_source GL_EXT_debug_marker GL_OES_EGL_image GL_EXT_unpack_subimage GL_NV_pack_subimage GL_OES_vertex_array_object
4/7/2016 3:41:51 PM: GL Context: Index: 205504804, Color: 32 (8888), Depth: 16, Stencil: 0, Samples: 0, Accum: 0 (0000), Buffers: 2, Stereo: False
4/7/2016 3:42:35 PM: Error in [Mania] Line 59: Expected type nullable`1 (name = NoteBodyStyle)

Taiko hitcircles and bigcircles are shared. So, it's impossible to distinguish Dons and Katsus other than colorsSafyire wrote:
Apologies if this is posted in the wrong thread but if I may ask is it possible to have separate hitcircles for the Don and Katsu in Taiko mode? I have trouble reading in Taiko and if what I asked is possible then I could make my hitcircles easier to read for me. thanks
Ah, thank you for the answer. I will just keep practicing on improving my reading in TaikoOsuMe65 wrote:
Taiko hitcircles and bigcircles are shared. So, it's impossible to distinguish Dons and Katsus other than colorsSafyire wrote:
Apologies if this is posted in the wrong thread but if I may ask is it possible to have separate hitcircles for the Don and Katsu in Taiko mode? I have trouble reading in Taiko and if what I asked is possible then I could make my hitcircles easier to read for me. thanks
Just put the skin elements into your beatmap folder and it will load automatically when You play it. Except the skin.ini won't work iircShadowIWS wrote:
This has been bothering me for some time now. How do you add a skin to a beatmap and that beatmap only? Since Im creating a beatmap and a unique skin will add the effect

Uncheck "Hit Lightning" in the options or replace lighting.png in your skin folder with a blank (1x1) *.png file...TheRedstom wrote:
question/bug
my hitcircles still do the watery expanding effect but i only have default-1-9.png-s in my skin folder and the hitcircle and hitcircleoverlay are both transparent pictures. help?
thanks for the quick replyRio- wrote:
Uncheck "Hit Lightning" in the options or replace lighting.png in your skin folder with a blank (1x1) *.png file...TheRedstom wrote:
question/bug
my hitcircles still do the watery expanding effect but i only have default-1-9.png-s in my skin folder and the hitcircle and hitcircleoverlay are both transparent pictures. help?
it fixed it thank you very muchHaskorion wrote:
Change you skin version to "Version: 2" or higher (or add it to your skin). The numbers should no longer appear when a hitburst pops up.
