I already made my code for the pro micro. You just need to tell me your keys and the pins, that you're using, then i'll do it for you. (If you'll use the pro micro ofc)quinton69 wrote:
Can you send me the Arduino coding pls I'm using the two keys shift and z
Do you know the alternative for the pcb
forum
Osu! Keyboard Recipe - For the DIY Minded
posted
Total Posts
95
Is this will work with arduino nano ? or i must use like leonardo or uno? I want to use arduino Nano or Mini because it's cheap here xD
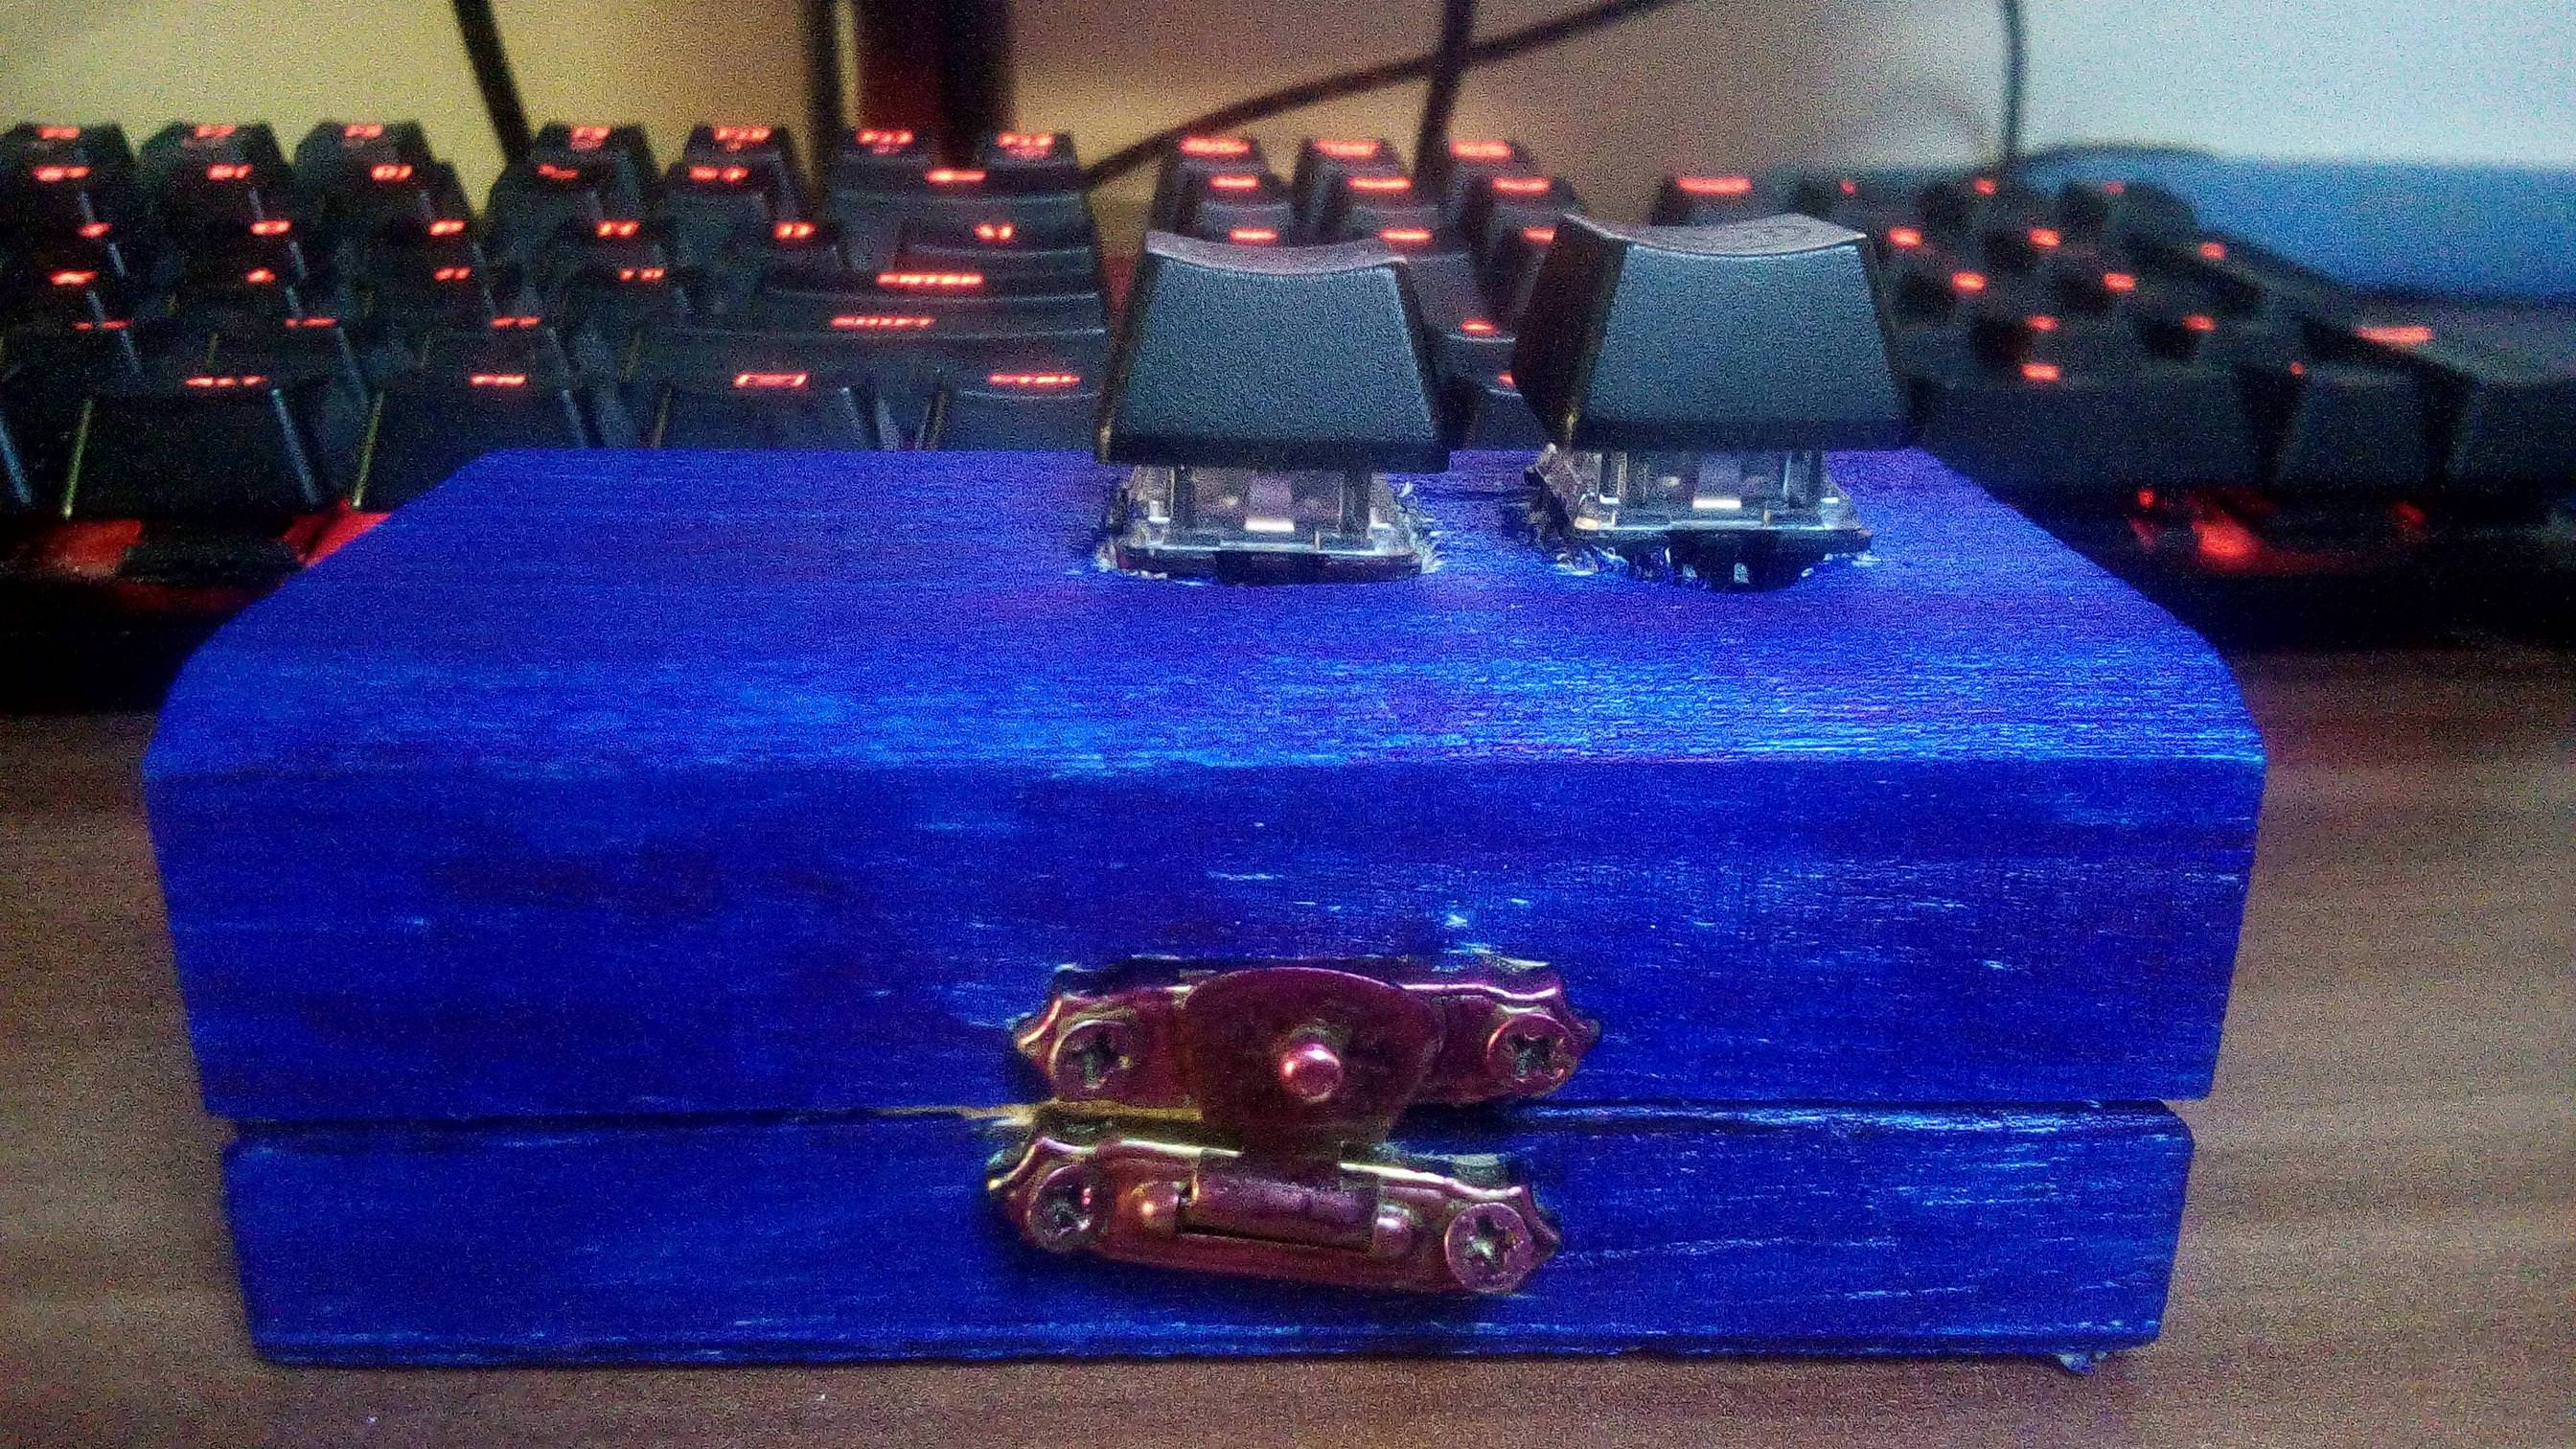
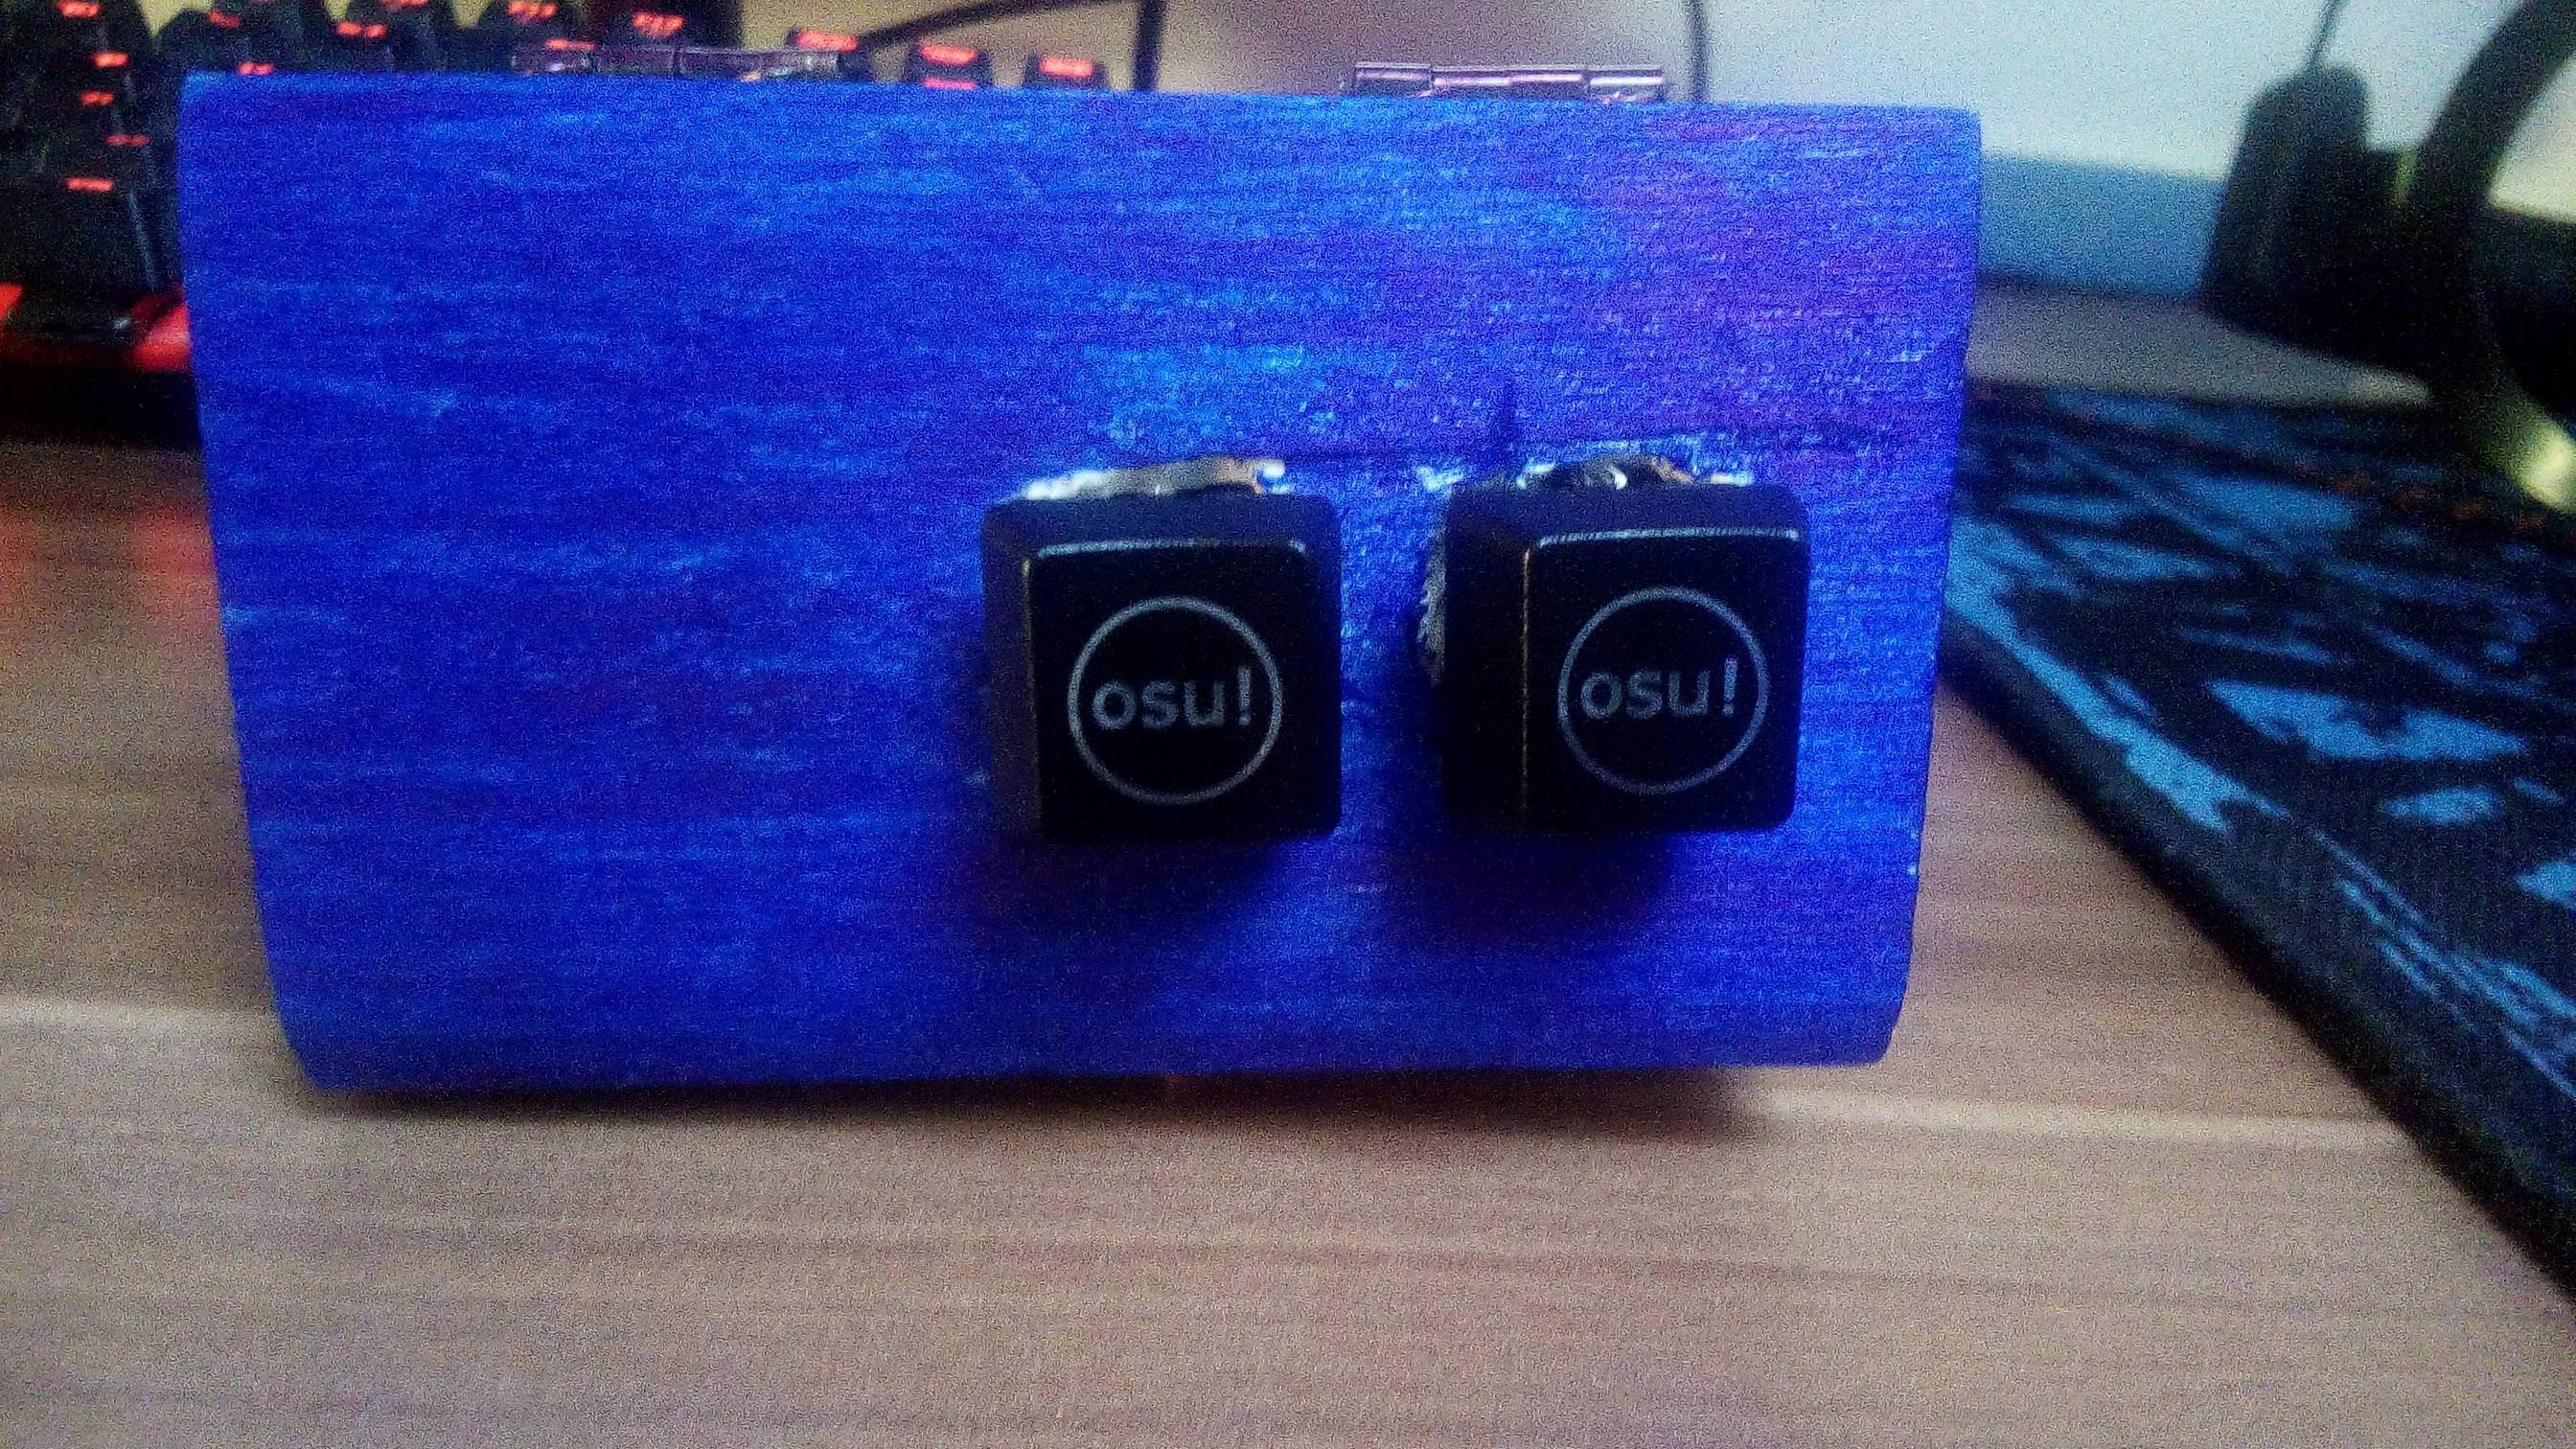
Thx to this guide i have managed to make my own osu keyboard.I wanted to thank you and here are some pictures of how mine turned out.

Also i have never wrote code for an arduino pro micro, but this is what i came up with.:
int buttonPin = 9;
int Pinbutton = 6;
#include <Keyboard.h>
void setup()
{
pinMode(buttonPin, INPUT);
digitalWrite(buttonPin, HIGH);
pinMode(Pinbutton, INPUT);
digitalWrite(Pinbutton, HIGH);
}
void loop()
{
if (digitalRead(buttonPin) == 0)
{
Keyboard.press('z');
delay(5);
}
if (digitalRead(buttonPin) == 1)
{
Keyboard.release('z');
}
if (digitalRead(Pinbutton) == 0)
{
Keyboard.press('x');
delay(5);
}
if (digitalRead(Pinbutton) == 1)
{
Keyboard.release('x');
}
}
It works just fine but if someone can edit it to make it better i would appreciate it.
THX FOR THE AWESOME GUIDE.
Topic Starter
^^ No problem
Will update the guides soon. Hopefully by this week.
Will update the guides soon. Hopefully by this week.
thanks for the interesting article, I'm already going to buy all the details and start assembling))
Nice one! I built mine with the Pro Micro too. Isn't your keyboard a bit tall? Seems hard to get your fingers toikorus1 wrote:
Thx to this guide i have managed to make my own osu keyboard.I wanted to thank you and here are some pictures of how mine turned out.
Also i have never wrote code for an arduino pro micro, but this is what i came up with.:
int buttonPin = 9;
int Pinbutton = 6;
#include <Keyboard.h>
void setup()
{
pinMode(buttonPin, INPUT);
digitalWrite(buttonPin, HIGH);
pinMode(Pinbutton, INPUT);
digitalWrite(Pinbutton, HIGH);
}
void loop()
{
if (digitalRead(buttonPin) == 0)
{
Keyboard.press('z');
delay(5);
}
if (digitalRead(buttonPin) == 1)
{
Keyboard.release('z');
}
if (digitalRead(Pinbutton) == 0)
{
Keyboard.press('x');
delay(5);
}
if (digitalRead(Pinbutton) == 1)
{
Keyboard.release('x');
}
}
It works just fine but if someone can edit it to make it better i would appreciate it.
THX FOR THE AWESOME GUIDE.
Edit: Why did you put delays in the code?
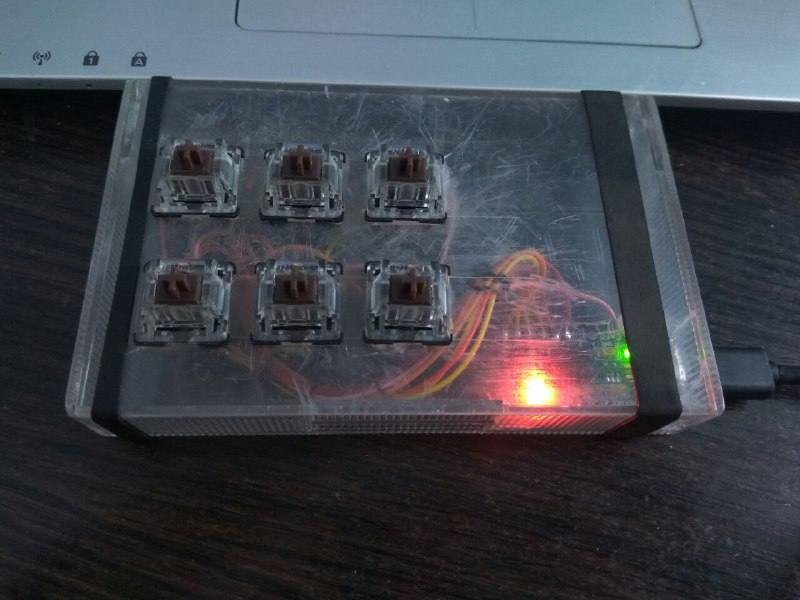
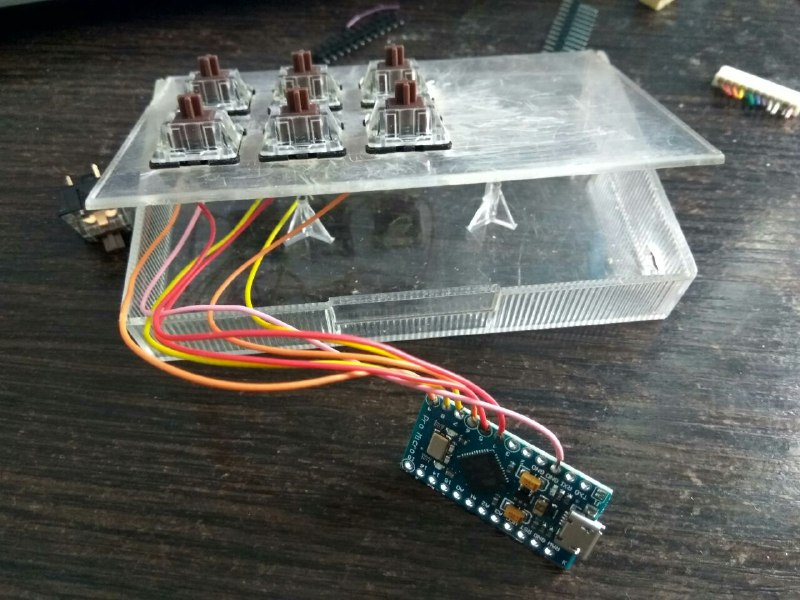
hello, today my arduino came to me and I finally made my custom small keyboard .. That's how it looks so far (I plan to paste it with a print and add the LEDs). Here is the code itself (took from the author above and reworked under 6 buttons). Good luck to all
int buttonPin1 = 4;
int buttonPin2 = 5;
int buttonPin3 = 6;
int buttonPin4 = 7;
int buttonPin5 = 8;
int buttonPin6 = 9;
#include <Keyboard.h>
void setup()
{
pinMode(buttonPin1, INPUT);
digitalWrite(buttonPin1, HIGH);
pinMode(buttonPin2, INPUT);
digitalWrite(buttonPin2, HIGH);
pinMode(buttonPin3, INPUT);
digitalWrite(buttonPin3, HIGH);
pinMode(buttonPin4, INPUT);
digitalWrite(buttonPin4, HIGH);
pinMode(buttonPin5, INPUT);
digitalWrite(buttonPin5, HIGH);
pinMode(buttonPin6, INPUT);
digitalWrite(buttonPin6, HIGH);
}
void loop()
{
if (digitalRead(buttonPin1) == 0)
{
Keyboard.press('z');
delay(5);
}
if (digitalRead(buttonPin1) == 1)
{
Keyboard.release('z');
}
if (digitalRead(buttonPin2) == 0)
{
Keyboard.press('x');
delay(5);
}
if (digitalRead(buttonPin2) == 1)
{
Keyboard.release('x');
}
if (digitalRead(buttonPin3) == 0)
{
Keyboard.press('c');
delay(5);
}
if (digitalRead(buttonPin3) == 1)
{
Keyboard.release('c');
}
if (digitalRead(buttonPin4) == 0)
{
Keyboard.press('`');
delay(5);
}
if (digitalRead(buttonPin4) == 1)
{
Keyboard.release('`');
}
if (digitalRead(buttonPin5) == 0)
{
Keyboard.press(KEY_TAB);
delay(5);
}
if (digitalRead(buttonPin5) == 1)
{
Keyboard.release(KEY_TAB);
}
if (digitalRead(buttonPin6) == 0)
{
Keyboard.press(KEY_ESC);
delay(5);
}
if (digitalRead(buttonPin6) == 1)
{
Keyboard.release(KEY_ESC);
}
}
Topic Starter
Awesome
thnikk osu keypad style
2 hours of solding, 15 min of programming
Code:
#include <Keyboard.h>
void setup() {
Keyboard.begin();
Serial.begin(9600);
}
void loop() {
Serial.println(digitalRead(A2));
if (digitalRead(A2) == HIGH) {
Keyboard.press('w');
}
else {
Keyboard.release('w');
}
Serial.println(digitalRead(A1));
if (digitalRead(A1) == HIGH) {
Keyboard.press('e');
}
else {
Keyboard.release('e');
}
}
Hey, thanks OP for this post!
5 days ago I didn't know anything about Arduinos, Mechanical Keyboards, soldering, 3D-modelizing... learnt it all, and I managed to end up with this, which I'm pretty proud of: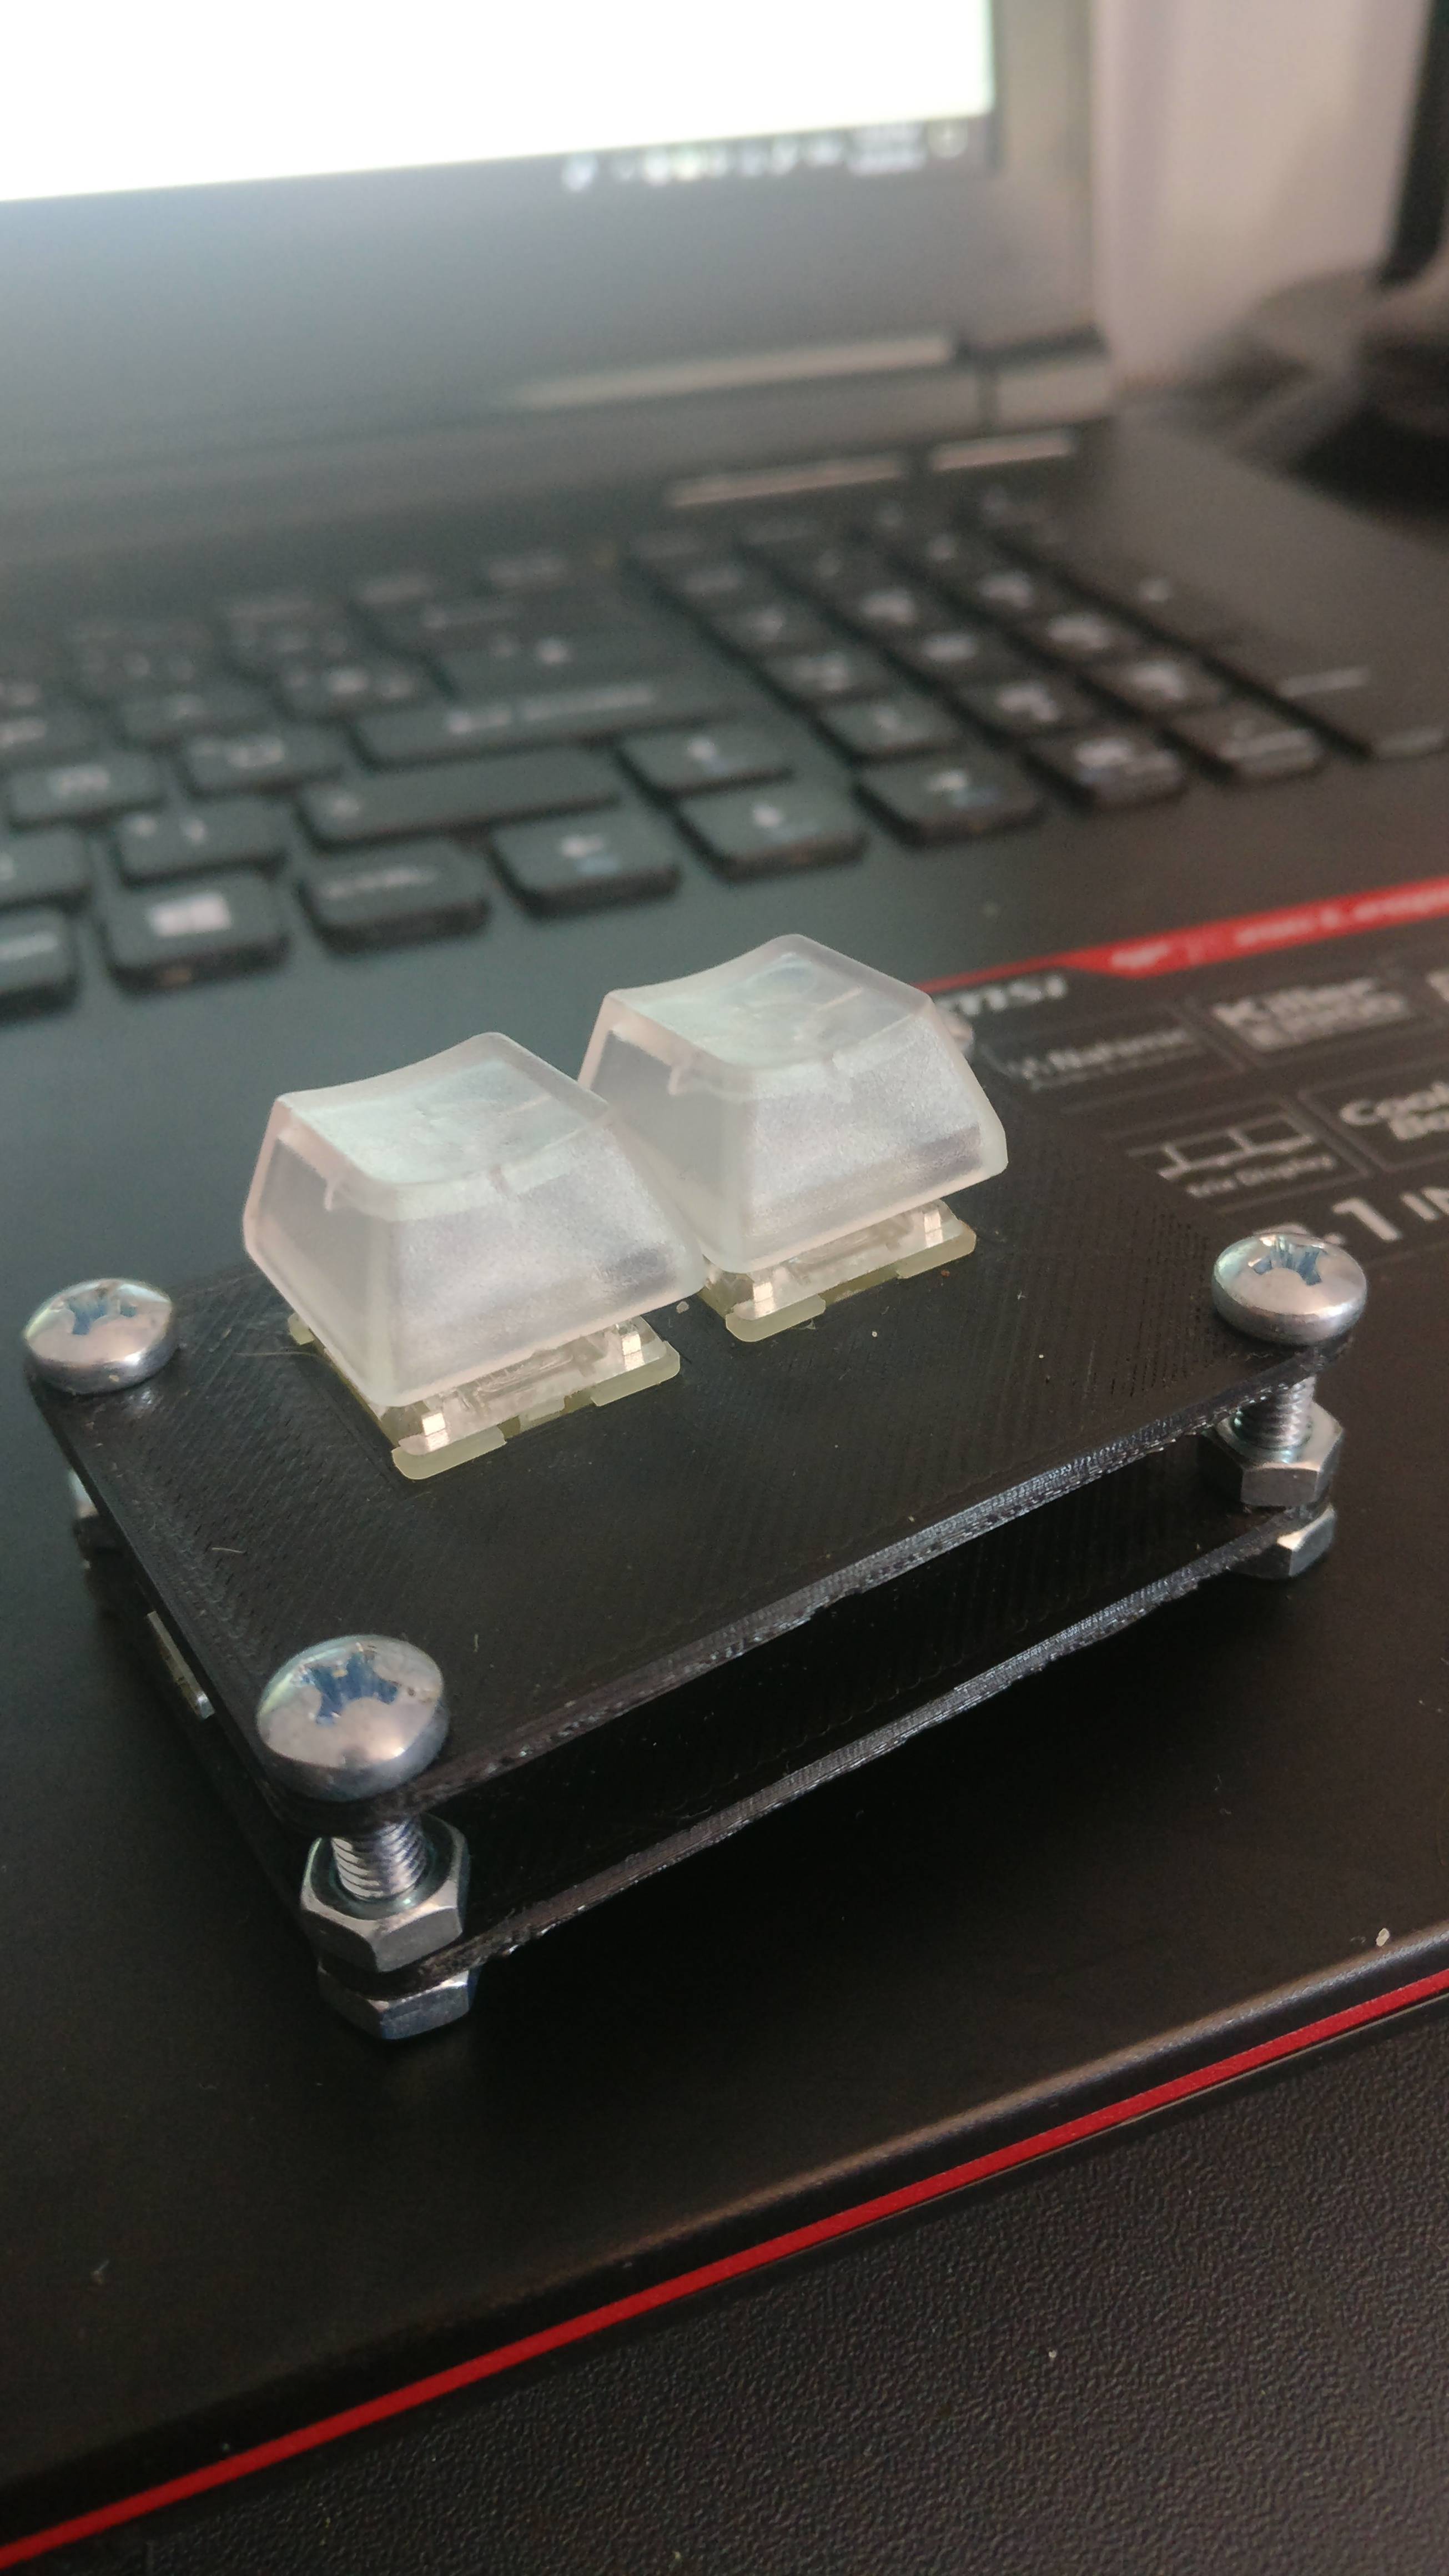
Basically, I bought a Chinese Arduino Pro Micro clone on ebay for less than 3€ and some Cherry MX Silver Switches for about 5€ (I recommend not buying these for developping purposes, they're very expensive on eBay, maybe buy Kailh or any other brand for prototyping), made the case 3D-printed on a P2P website for 6€, and bought for 2.5€ of screws/bolts.
I first learned Arduino code from scratch and gathered some help from the previous posters on this thread, but I end up with my own code, in which I added some extra LEDs (because I don't have any SMD LEDs to add to my switches for now), and I'm planning to add 3 extra buttons (Space, Escape, and Retry) in the future.
Then I bought a soldering iron and started prototyping my keyboard with some breadboard and jumper wires, to learn code and experiment a bit more. When I ended up with something functionnal, I started designing the case (on Tinkercad, very simple to use) and got it printed.
The holes I designed were made for M5 Screws (5.25mm diameter), but they didnt fit, so I ended up using M4 screws (working pretty well).
Here is the code I used:
(keep in mind that I'm using a AZERTY keyboard, that the Arduino IDE doesn't recognize (I guess?))
If you have some questions before jumping into it, don't hesitate ! It's such an easy and great project to start with !
I can send you the 3D file of the case, but it will be even better if you find your own design and let your mind express.
PS: Cherry MX Silver Speed switches are amazing, getting from laptop-keyboard to those is for real amazing !
5 days ago I didn't know anything about Arduinos, Mechanical Keyboards, soldering, 3D-modelizing... learnt it all, and I managed to end up with this, which I'm pretty proud of:
Basically, I bought a Chinese Arduino Pro Micro clone on ebay for less than 3€ and some Cherry MX Silver Switches for about 5€ (I recommend not buying these for developping purposes, they're very expensive on eBay, maybe buy Kailh or any other brand for prototyping), made the case 3D-printed on a P2P website for 6€, and bought for 2.5€ of screws/bolts.
I first learned Arduino code from scratch and gathered some help from the previous posters on this thread, but I end up with my own code, in which I added some extra LEDs (because I don't have any SMD LEDs to add to my switches for now), and I'm planning to add 3 extra buttons (Space, Escape, and Retry) in the future.
Then I bought a soldering iron and started prototyping my keyboard with some breadboard and jumper wires, to learn code and experiment a bit more. When I ended up with something functionnal, I started designing the case (on Tinkercad, very simple to use) and got it printed.
The holes I designed were made for M5 Screws (5.25mm diameter), but they didnt fit, so I ended up using M4 screws (working pretty well).
Here is the code I used:
#include <Keyboard.h>

int W = 2;

int X = 8;

int LED1 = 6;

int LED2 = 7;


void setup()

{

Serial.begin(9600);


pinMode(W, INPUT);

pinMode(LED1, OUTPUT);

digitalWrite(W, HIGH);


pinMode(X, INPUT);

pinMode(LED2, OUTPUT);

digitalWrite(X, HIGH);

}


void loop(){


if (digitalRead(W) == 0)

{

Keyboard.press('z');

digitalWrite(LED1, HIGH);

delay(5);

}


if (digitalRead(W) == 1)

{

Keyboard.release('z');

digitalWrite(LED1, LOW);

}


if (digitalRead(X) == 0)

{

Keyboard.press('x');

digitalWrite(LED2, HIGH);

delay(5);

}


if (digitalRead(X) == 1)

{

Keyboard.release('x');

digitalWrite(LED2, LOW);

}

}
(keep in mind that I'm using a AZERTY keyboard, that the Arduino IDE doesn't recognize (I guess?))
If you have some questions before jumping into it, don't hesitate ! It's such an easy and great project to start with !
I can send you the 3D file of the case, but it will be even better if you find your own design and let your mind express.
PS: Cherry MX Silver Speed switches are amazing, getting from laptop-keyboard to those is for real amazing !
Topic Starter
C0MP0T3 wrote:
-snip-
Your build looks a lot like my second build. Congrats!
I even used M4 bolts on my second build as a matter of fact
Topic Starter
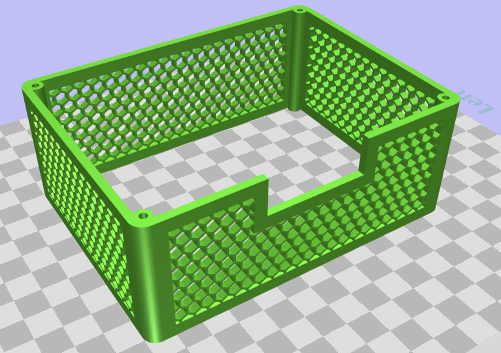
UPDATE July 20, 2018:
So yeah, just finished summer school recently and currently working on revamping the guide as usual. Really, this time I am doing it since it will be published on other forums/sites as well. Hopefully those will address some issues associated with the first revision of the keyboard build guide.
The upcoming guide will be focused towards an 8-key model that I posted in this thread earlier this year. Any deviations in the design will be an exercise for the end user. Of course, PMing me for help will be answered as quickly as possible.
For now, Sanwa build V2 in progress. I tried to do honeycomb walls for this build.
So im staring with a pro micro arduino, can i have the code for two buttons ? I use z and x
AddDominator wrote:
So im staring with a pro micro arduino, can i have the code for two buttons ? I use z and x
U must make a picture of your arduino, then I will help u
Topic Starter
The example code in the first post should also work for Pro Micro, since it uses Arduino keyboard library, not a Teensy specific one.
UnleashedMyself wrote:
AddDominator wrote:
So im staring with a pro micro arduino, can i have the code for two buttons ? I use z and x
U must make a picture of your arduino, then I will help u
Since my camera broke, i can only use internet picture
https://imgur.com/a/1J6D2w8
P/S: Does Pro Micro have internal resistors ?
The Gambler wrote:
UPDATE July 20, 2018:
So yeah, just finished summer school recently and currently working on revamping the guide as usual. Really, this time I am doing it since it will be published on other forums/sites as well. Hopefully those will address some issues associated with the first revision of the keyboard build guide.
The upcoming guide will be focused towards an 8-key model that I posted in this thread earlier this year. Any deviations in the design will be an exercise for the end user. Of course, PMing me for help will be answered as quickly as possible.
For now, Sanwa build V2 in progress. I tried to do honeycomb walls for this build.
I'm starting to play Mania more and more, I may be doing a 4k keyboard later ! What's "Sanwa" build?
Topic Starter
C0MP0T3 wrote:
I'm starting to play Mania more and more, I may be doing a 4k keyboard later ! What's "Sanwa" build?
Sanwa V1 is posted in the first post; it is basically the osu! keypad using arcade buttons. The most prominent switch amongst arcade setups use circular Sanwa buttons.
I have add keyboard and hid library but it keep showing this error, please help
https://imgur.com/a/eqTd1XI
https://imgur.com/a/eqTd1XI
Topic Starter
AddDominator wrote:
I have add keyboard and hid library but it keep showing this error, please help
https://imgur.com/a/eqTd1XI
You need Keyboard.begin() in setup() before doing any keyboard presses.
How to add more LED mode for RGB ? Like pressing a button and it will change the mode. My code is like this
int ButtonZ = 9;
int ButtonX = 10;
void setup()
{
pinMode(ButtonZ, INPUT);
pinMode(ButtonX, INPUT);
}
void loop()
{
if (digitalRead(ButtonZ) == 0)
{
Keyboard.press('z');
delay(5);
}
if (digitalRead(ButtonZ) == 1)
{
Keyboard.release('z');
}
if (digitalRead(ButtonX) == 0)
{
Keyboard.press('x');
delay(5);
}
if (digitalRead(ButtonX) == 1)
{
Keyboard.release('x');
}
}
AddDominator wrote:
How to add more LED mode for RGB ? Like pressing a button and it will change the mode. My code is like thisint ButtonZ = 9;
int ButtonX = 10;
void setup()
{
pinMode(ButtonZ, INPUT);
pinMode(ButtonX, INPUT);
}
void loop()
{
if (digitalRead(ButtonZ) == 0)
{
Keyboard.press('z');
delay(5);
}
if (digitalRead(ButtonZ) == 1)
{
Keyboard.release('z');
}
if (digitalRead(ButtonX) == 0)
{
Keyboard.press('x');
delay(5);
}
if (digitalRead(ButtonX) == 1)
{
Keyboard.release('x');
}
}
just use switch()
Anyone have a PCB guide ? Plz Help
Topic Starter
UPDATE August 12, 2018:
Hi again everyone,
After slow progress on my end due to juggling different projects I have finished a rough draft of the newer updated guide. Hopefully, even with the rough formatting, people should find the ideas expressed in the doc easier to absorb than last time. However, for the time being, the guide exists as a doc file and currently not formatted to osu! forum standards.
Also, SANWA V2 has been finished.
Coming back, just to say thanks about this nice tutorial, you're the best
https://imgur.com/a/2WP4SMc
https://imgur.com/a/2WP4SMc
Topic Starter
AddDominator wrote:
Oof... the betrayal is real xD
The Gambler wrote:
AddDominator wrote:
Oof... the betrayal is real xD
Thanks you for the tutorial <3
I've made an osukeyboard with a
mouse(ve broken、and a little box to cover them,but now it still have no lights and not goodlooking at all
Here I am Looking forward to develop an new kind of osuing key board which's able to put one all hand on it and give players a much more comfortable enverment to power there brain(IQ+10
(:DL
mouse(ve broken、and a little box to cover them,but now it still have no lights and not goodlooking at all
Here I am Looking forward to develop an new kind of osuing key board which's able to put one all hand on it and give players a much more comfortable enverment to power there brain(IQ+10
(:DL
ZisonZishen wrote:
I've made an osukeyboard with a
mouse(ve broken,keys and a little box to cover them,but now it still have no lights at all,and not goodlooking
Here I am Looking forward to make an new osu key board which's able to put on fingers and more cheap(:D
and it's still an idea lol
https://www.youtube.com/watch?v=jM598vSvPu0&t=221s Try this
AddDominator wrote:
ZisonZishen wrote:
I've made an osukeyboard with a
mouse(ve broken,keys and a little box to cover them,but now it still have no lights at all,and not goodlooking
Here I am Looking forward to make an new osu key board which's able to put on fingers and more cheap(:D
and it's still an idea lol
https://www.youtube.com/watch?v=jM598vSvPu0&t=221s Try this
ahh,39
Skylone18 wrote:
Just a question;
Are you using any resistors?
I see a resistor in the first figure of your guide, but on second figure and in the third one, I do not see any.
Arduino leonardo don't need resistors
https://imgur.com/a/8cU9PEZ
Thanks to Ruqimao and Gambler <3
Thanks to Ruqimao and Gambler <3
A few billion years late, but how do you suppose you would get cherry mx slivers?
Topic Starter
genericgarbage wrote:
A few billion years late, but how do you suppose you would get cherry mx slivers?
I don't think MX Silver is marketed as a custom keyboard product. I would rather you check out other switches instead: https://input.club/the-comparative-guide-to-mechanical-switches/
Since you said you wanted Silvers, I suggest looking at other equivalents like Kailhua Red, BOX Red, Gateron Clears, Matias Linear, etc.
Topic Starter
UPDATE 02/09/2019: Small updates for you guys. I uploaded the full version of my own working code onto the repository, along with some repo cleaning. Hopefully, everything should make a bit more sense.
I have also prototyped some PCBs along the way, like the 8-Pack and the 4-Square, each under their own repositories in my account. Should make for some more compact and interesting builds.
Otherwise, just letting you know that I'm still here (as once in osu!, always in osu!).
Happy clicking
I have also prototyped some PCBs along the way, like the 8-Pack and the 4-Square, each under their own repositories in my account. Should make for some more compact and interesting builds.
Otherwise, just letting you know that I'm still here (as once in osu!, always in osu!).
Happy clicking
Hey, I want to buy Redragon ARYAMAN K569 (it comes with Outemu blue switches). I wanted to ask if it's possible to replace a few switches in it with other switches? (like i want to replace one Outemu blue switch with Cherry MX Red). Is that doable easily?
srafay wrote:
Hey, I want to buy Redragon ARYAMAN K569 (it comes with Outemu blue switches). I wanted to ask if it's possible to replace a few switches in it with other switches? (like i want to replace one Outemu blue switch with Cherry MX Red). Is that doable easily?
Does the keyboard have removable switch feature? If so you can just use keypuller to remove the switch and replace it. Otherwise you have to resolder the PCB to remove the switch and reinstall it again, which I don't recommend.
Here's an example of removable switch keyboard that I have
[Zarc] wrote:
srafay wrote:
Hey, I want to buy Redragon ARYAMAN K569 (it comes with Outemu blue switches). I wanted to ask if it's possible to replace a few switches in it with other switches? (like i want to replace one Outemu blue switch with Cherry MX Red). Is that doable easily?
Does the keyboard have removable switch feature? If so you can just use keypuller to remove the switch and replace it. Otherwise you have to resolder the PCB to remove the switch and reinstall it again, which I don't recommend.
Here's an example of removable switch keyboard that I have
Thanks for replying. The keyboard you have seems to be available only in your country I guess. After checking it's specs, it seems that it has Outemu blue switches. How is your experience with these switches (stream maps in which you need to double tap or maps in which you need to tap faster)
Topic Starter
srafay wrote:
Hey, I want to buy Redragon ARYAMAN K569 (it comes with Outemu blue switches). I wanted to ask if it's possible to replace a few switches in it with other switches? (like i want to replace one Outemu blue switch with Cherry MX Red). Is that doable easily?
Yes, you will have to desolder the switch and LED using a soldering iron, and solder wick/desoldering pump. You have to be careful in the process as you do not want to rip out PCB pads when removing the switch.
After you have desoldered the old switch, you will need to clean the hole where the switch pin used to be, then solder in the new switch, plus LED.